Apple Watch Reviews

Expert Apple Watch reviews, smartwatch comparisons, and maintenance tips. Find your perfect timepiece with detailed buying guides and care tutorials.

Apple Watch Series 10 Health Tracking: What’s New in 2026


If you’ve ever wondered whether your smartwatch could do more than just count steps, the Apple Watch Series 10 answers with quiet confidence. It’s not the flashiest upgrade in Apple’s history—no bold new hardware, no flashy redesign—but as a health tracking platform, it stands at the pinnacle of consumer wearables. With FDA-cleared features, clinically validated sensors, and seamless integration into daily life, the Series 10 transforms passive data into meaningful health insights. Whether you’re monitoring heart rhythm, screening for sleep apnea, or tracking fertility, this device functions as a 24/7 wellness partner—especially for iPhone users who want science-backed tools on their wrist.

Unlike previous models that introduced new sensors, the Series 10 focuses on refinement over revolution. There’s no new optical heart sensor or blood oxygen monitor. Instead, Apple leverages over a decade of algorithmic evolution and regulatory progress to deliver unmatched reliability across core health metrics. With watchOS 11, it gains advanced tools like Training Load and home-based sleep apnea detection—features once exclusive to medical devices. For the first time, a consumer smartwatch offers real clinical value beyond basic fitness tracking.

This guide breaks down every health feature on the Apple Watch Series 10, backed by testing data, user insights, and expert analysis. You’ll learn where it excels, where it falls short, and whether upgrading is worth it for your health goals.

Heart Rate Accuracy: Best-in-Class Across Activities

Apple Watch Series 10 heart rate accuracy comparison chest strap

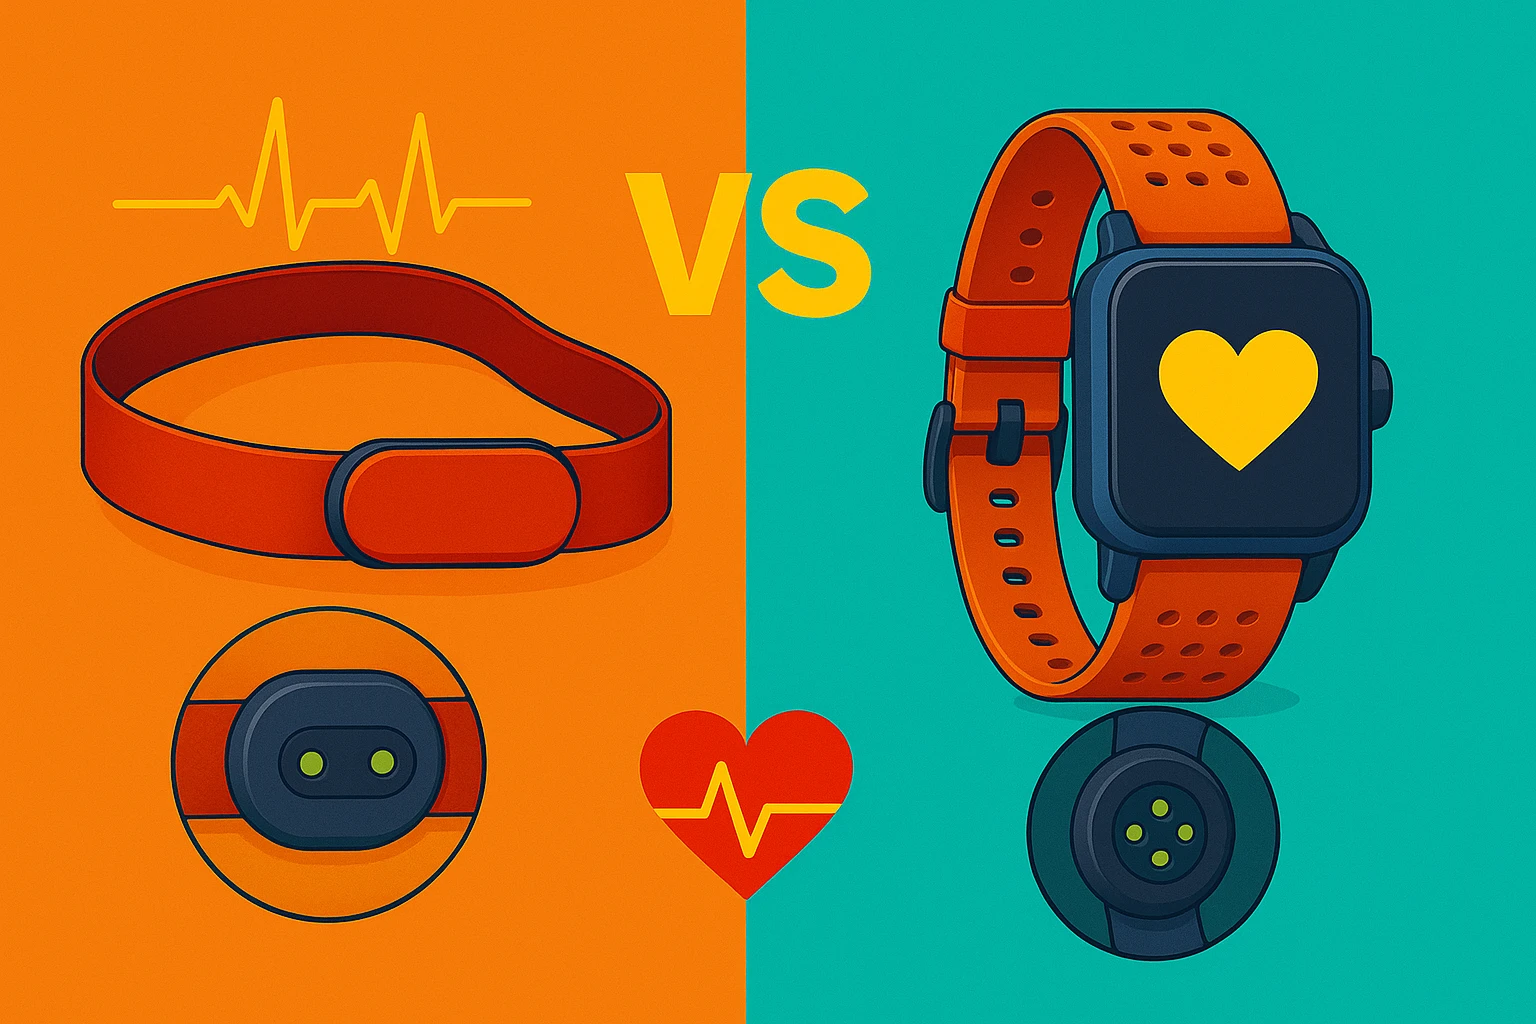
The Apple Watch Series 10 delivers near-perfect heart rate tracking during most workouts, consistently matching the accuracy of chest straps like the Polar H10.

Indoor Cycling and Running Performance

In real-world tests, both the 42 mm and 46 mm models achieved a correlation of 1.0 with chest strap readings during indoor cycling and running. This means the watch tracks your BPM within 1–3 beats per minute, even at peak intensity. Signal dropout is rare, and when motion interference occurs, the watch pauses tracking instead of guessing, preventing false spikes.

For runners and spin class enthusiasts, this level of precision ensures your calorie burn, VO₂ max estimates, and recovery metrics stay accurate. The 46 mm model holds a slight edge in bright sunlight, maintaining signal stability where smaller models may briefly dip.

Outdoor Activity and Weightlifting Limits

Outdoor running and cycling show similarly strong results, with the 46 mm version maintaining a perfect 1.0 correlation. The 42 mm model drops to 0.99—still excellent—but may lose signal during rapid arm movements or high-intensity bursts.

Weightlifting remains the toughest challenge for any wrist-based tracker. During resistance training, the Series 10 scores a 0.94 correlation, meaning it captures trends accurately but can miss peak heart rates due to muscle tension blocking blood flow. Still, it outperforms most Fitbit and Garmin watches by refusing to report false values when the signal is weak.

Pro Tip: For strength athletes, pair your Apple Watch with a Polar H10 chest strap via Bluetooth. This bypasses optical sensor limitations and delivers gym-accurate heart rate data.

Sleep Tracking: Top-Tier But No Improvement Over Series 9

While Apple continues to lead the wrist-based sleep tracking market, the Series 10 brings no meaningful gains in accuracy compared to its predecessors.

How Accurate Is Stage Detection?

Using EEG-grade ZMax headbands as a reference, the Series 10 correctly identifies:
86% of light sleep
72% of REM sleep
62% of deep sleep
– Only 29% of awake moments, mostly missing micro-awakenings

Despite these limitations, the watch reliably detects major sleep cycles—when deep and REM phases occur—and gets transition timing within 15 minutes of clinical readings. That’s sufficient for most users to understand sleep quality trends over time.

Who Should Rely on It?

If you’re upgrading from a Series 6 or later, don’t expect better sleep data. The algorithms haven’t changed. However, if you’re new to Apple Watch or coming from a Fitbit or Whoop, the Series 10 offers superior stage classification and smoother iPhone integration.

Expert Note: The Oura Ring still leads in detecting subtle disruptions, but the Apple Watch wins in ease of use and daily consistency.

Sleep Apnea Detection: FDA-Cleared Screening at Home

One of the most significant health advancements in any wearable arrives with watchOS 11: FDA-cleared sleep apnea detection.

How It Works Without New Sensors

Unlike lab tests requiring oxygen probes and brainwave monitors, the Series 10 uses its built-in accelerometer to detect breathing disturbances. By analyzing chest movement patterns during sleep, it identifies irregularities linked to obstructive sleep apnea (OSA).

You need 30 nights of consistent sleep data before the first assessment appears in the Health app. Results are categorized as:
– Low likelihood
– Medium likelihood
– High likelihood

Importantly, this isn’t a diagnosis—it’s a screening tool meant to prompt discussion with your doctor.

Why This Matters

Over 80% of sleep apnea cases go undiagnosed, often leading to hypertension, heart disease, and stroke. Traditional sleep studies are expensive and inconvenient. The Series 10 enables early, at-home detection, potentially saving lives by encouraging medical follow-up.

Availability Note: This feature only works on Series 9, Series 10, and Ultra 2 due to precise motion calibration requirements.

Temperature Sensing for Women’s Health and Wellness

Apple Watch temperature sensing cycle tracking infographic

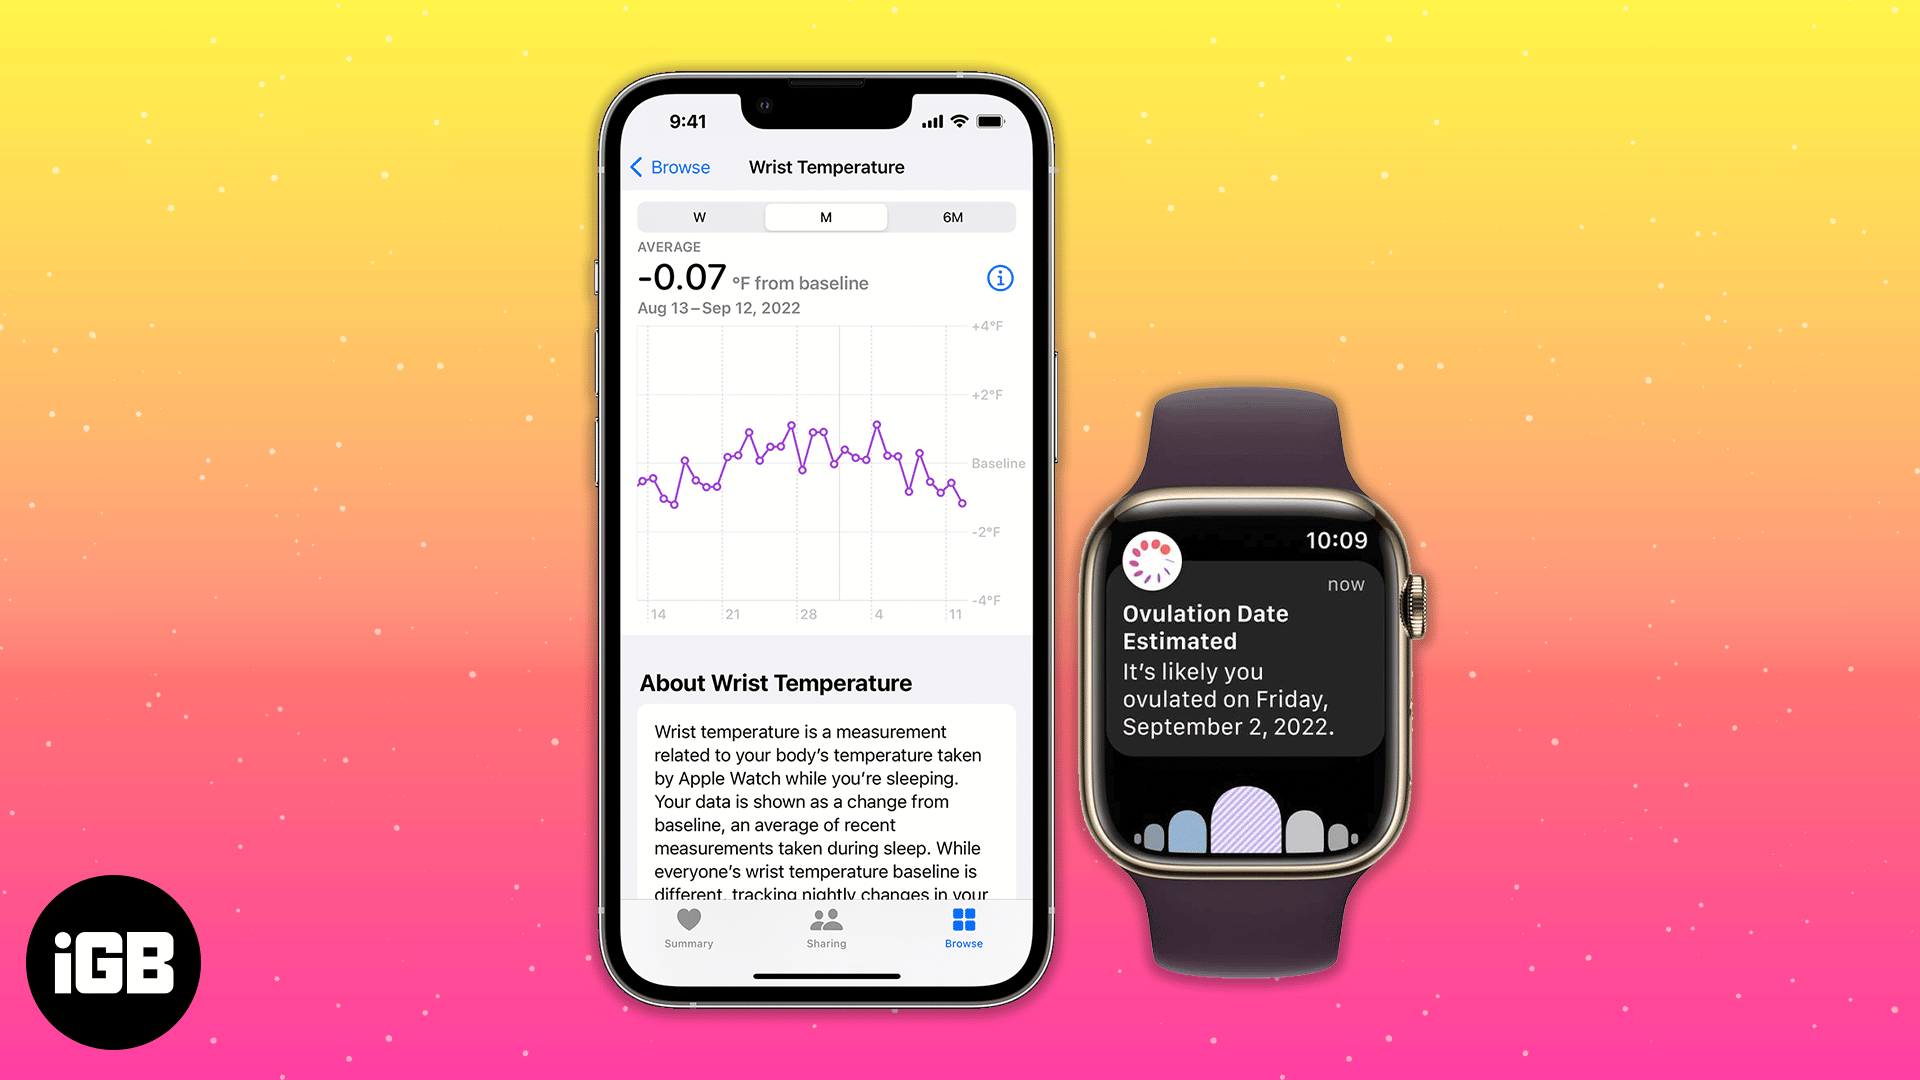
The Series 10’s wrist temperature sensor doesn’t measure real-time body temp like a thermometer. Instead, it tracks subtle overnight shifts to support long-term health insights.

Fertility and Cycle Tracking

Apple uses temperature trends to:
– Predict ovulation and menstruation windows
– Improve accuracy of period start date forecasts
– Flag potential irregularities in cycle length

For women trying to conceive or avoid pregnancy, this adds scientific rigor to natural family planning. When combined with symptom logging and basal body temperature trends, it becomes a powerful reproductive health tool.

Pregnancy and Illness Monitoring

The Health app now includes a pregnancy tracking mode, using temperature data alongside user inputs to:
– Estimate gestational age
– Track symptom patterns
– Monitor physiological changes

While not designed for fever detection, consistent deviations from your baseline temperature can signal illness onset—giving you early warning before symptoms appear.

ECG and Irregular Rhythm Notifications: Heart Health Guardian

The Apple Watch Series 10 includes two critical cardiac features: the ECG app and irregular rhythm notifications—both FDA-cleared.

How to Take an ECG

In 30 seconds, you can generate a single-lead electrocardiogram by:
1. Opening the ECG app
2. Resting your arm on a flat surface
3. Touching your finger to the digital crown

Results appear instantly and are saved in the Health app for sharing with your physician. The watch detects:
Atrial fibrillation (AFib)
– Bradycardia (low HR)
– Tachycardia (high HR)
– Unclassifiable readings

Passive Monitoring Saves Lives

Even without opening the app, the watch continuously analyzes heart rhythm in the background. If it detects possible AFib over multiple sessions, it sends an alert suggesting you see a doctor.

This has led to numerous documented cases of early arrhythmia detection—especially in people with no symptoms.

Key Benefit: Peace of mind for users over 40 or with family history of heart issues.

No Blood Oxygen Sensor: A Major Missed Feature

Despite its health focus, the Apple Watch Series 10 lacks a blood oxygen (SpO₂) sensor—a feature removed from standard models and not returning anytime soon.

Why This Matters

SpO₂ monitoring helps track:
– Respiratory health during illness (e.g., flu, pneumonia, post-COVID)
– Sleep quality (low oxygen = potential apnea or poor breathing)
– High-altitude performance

While the Ultra line retains this sensor, aluminum and titanium Series 10 models do not, limiting their utility for users concerned about lung function.

Workarounds

To monitor blood oxygen:
– Use a pulse oximeter (like Withings or Masimo)
– Consider the Apple Watch Ultra 2 if you need full respiratory tracking
– Rely on third-party apps that integrate external device data

User Impact: This omission makes the Series 10 less valuable during cold/flu season or for those with asthma or COPD.

Hearing Health: Protecting Your Ears Proactively

Apple continues its leadership in auditory wellness with robust noise exposure tracking.

Real-Time Noise Alerts

The watch automatically measures ambient sound levels using its microphone. If noise exceeds 80 dB for prolonged periods, it triggers alerts like:
– “You’ve been in a loud environment for 10 minutes.”
– “Consider moving to a quieter place.”

This helps prevent noise-induced hearing loss, especially in loud workplaces or concerts.

Headphone Safety Features

When using AirPods or other Bluetooth headphones, the watch tracks:
– Volume level
– Duration of use
– Cumulative weekly exposure

You can set limits and receive notifications if you exceed safe listening thresholds.

Clinical Value: These tools promote lifelong hearing protection—something most wearables ignore.

watchOS 11: Smarter Health Insights with Training Load

The Series 10 launched with watchOS 11, introducing Training Load—a metric that evaluates daily physical strain.

What Training Load Measures

Using data from:
– Heart rate
– Respiratory rate
– Sleep duration
– Workout effort (user-scored 1–10)

The system assigns a daily load rating:
– Well Below Average
– Below Average
– Average
– Above Average
– Well Above Average

This helps athletes avoid overtraining and supports recovery planning.

Limitations vs Competitors

Unlike Whoop or Oura, Apple does not provide prescriptive advice like “rest today” or “go hard.” It shows strain but leaves interpretation to the user. You also need about one month of sleep data before the baseline stabilizes.

Best For: Active users who want insight into daily exertion without being told what to do.

Third-Party Apps: Unlock Advanced Health Insights

The Apple Watch Series 10 shines as a platform, not just a device. Third-party apps expand its health capabilities dramatically.

Levels App: Metabolic Health Tracking

By connecting to a continuous glucose monitor (CGM), the Levels app turns your watch into a metabolic dashboard. It combines:
– Glucose trends
– Food logs (via photo or barcode scan)
– Activity and sleep data

You get:
– Meal impact scores
– Real-time insulin sensitivity feedback
– Personalized energy optimization tips

Results from blood analysis arrive in 48 hours, helping users fine-tune diet and exercise for better energy and body composition.

Who It’s For: People managing prediabetes, optimizing performance, or seeking weight loss.

Fall Detection: Reliable Emergency Response

Fall Detection remains one of the most life-saving features on the Apple Watch.

Real-World Test Results

In a controlled test:
– A deliberate fall while biking was detected instantly
– Emergency alert activated after 30 seconds
– User successfully dismissed false alarm
– No accidental triggers during normal use

The system uses motion data and impact force to distinguish real falls from bumps or drops.

Who Should Enable It?

  • Seniors or older adults
  • People with mobility issues
  • Outdoor athletes (cyclists, hikers)

When enabled, it can call emergency services and notify your emergency contacts automatically.

Design and Battery Life: Comfort Meets Daily Charging

Apple Watch Series 10 size comparison wrist

The Series 10’s thinner, lighter build improves comfort for 24/7 wear—critical for accurate sleep and health monitoring.

Key Comfort Upgrades

  • 9.7 mm thick — 10% thinner than Series 9
  • 20% lighter in titanium models
  • Larger display on 46 mm than even the 49 mm Ultra 2 (due to curved edges)

This means:
– Less pressure on the wrist during sleep
– Reduced skin irritation
– Higher compliance with overnight tracking

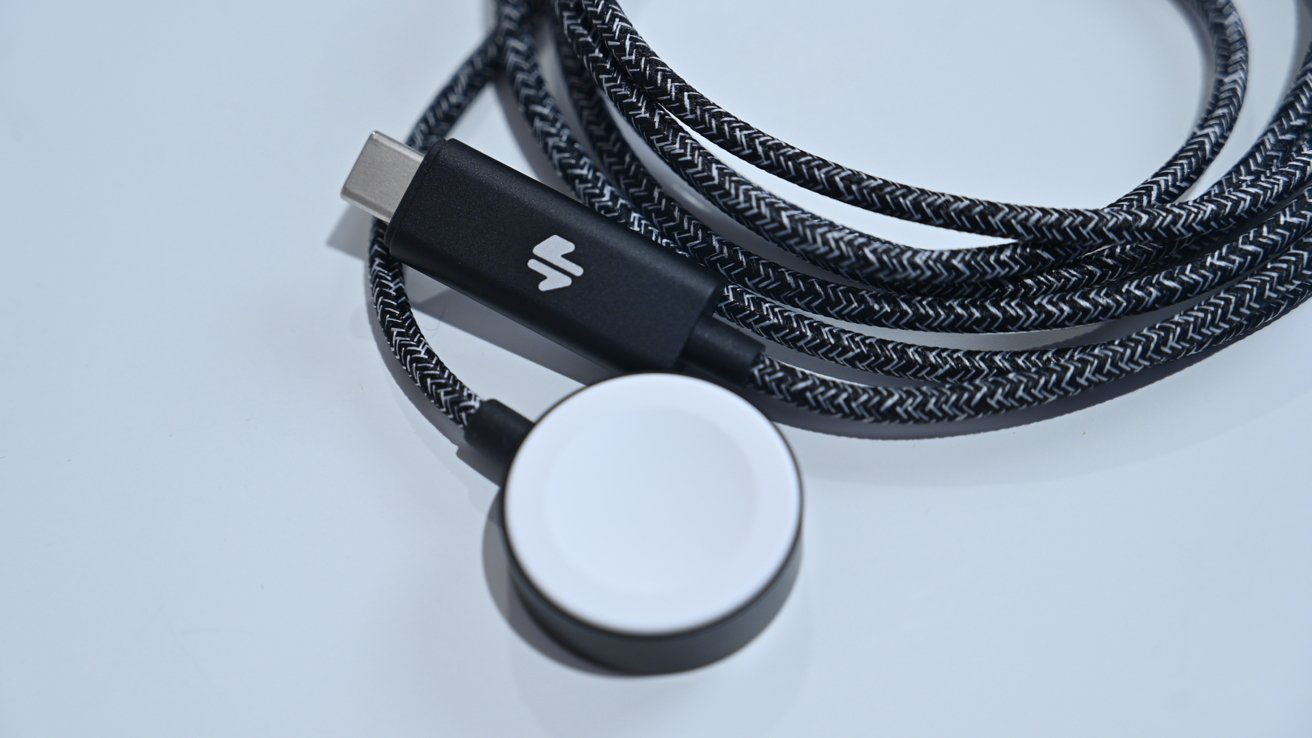
Despite improvements, battery life remains 18 hours, requiring daily charging. However, fast charging (80% in 30 minutes) makes it easy to top up during your morning routine.

Health Impact: The more comfortable the watch, the more consistently you’ll wear it—leading to better long-term data.

iPhone Integration: The Apple Health Advantage

No other smartwatch matches the ecosystem depth of the Apple Watch.

Centralized Health Dashboard

All data flows into the Health app on iPhone, where you can:
– View trends over time
– Share reports with doctors
– Set medication or hydration reminders
– Enable Live Activities (e.g., water intake tracking)

Siri and Smart Stack

  • Use Siri to log health data: “Start sleep timer,” “Log headache”
  • Smart Stack widgets show:
  • Upcoming medication
  • Rain alerts
  • Sleep schedule reminders

This level of automation reduces mental load and increases adherence to healthy habits.

Who Should Buy the Apple Watch Series 10?

Ideal Buyers

  • New Apple Watch users: Best-in-class health tracking right out of the box
  • Women managing fertility or pregnancy: Enhanced cycle and temperature insights
  • Heart health-conscious individuals: ECG and AFib detection offer real peace of mind
  • Sleep apnea risk patients: FDA-cleared screening is a game-changer
  • iPhone power users: Seamless integration with Health app and Fitness+

Who Can Skip It?

  • Series 6–9 owners: No meaningful health tracking upgrades
  • Budget buyers: The Apple Watch SE (2022) offers 90% of health features at half the price
  • Android users: No full functionality; not compatible
  • Multi-day battery seekers: Consider Garmin or Whoop instead

Final Note: The Apple Watch Series 10 isn’t about new sensors—it’s about trusted science, seamless software, and clinical-grade tools in a comfortable, everyday wearable. It’s the most complete health tracking platform for iPhone users in 2025. While it lacks blood oxygen monitoring and multi-day battery life, its FDA-cleared sleep apnea detection, ECG, and refined algorithms make it a leader in preventive health. If you’re serious about long-term wellness, the Series 10 isn’t just a smartwatch—it’s a health partner.

Apple Watch Sensor Not Working? Fix It Fast


You’re halfway through a morning run, relying on your Apple Watch to track your heart rate, but the screen just says “Measuring…” — and never delivers a reading. Your active calories show zero. Sleep data isn’t syncing. The green lights on the back of your watch won’t turn on. If this sounds familiar, you’re not alone. Thousands of Apple Watch users — including owners of the Ultra 2, Ultra 3, Series 9, Series 7, and SE (2nd and 3rd gen) — are reporting heart rate sensor failure, especially after updating to watchOS 10, 26.0.1, or 26.2.

This isn’t a rare hardware defect — it’s a widespread software bug that mimics a broken sensor. The good news? The hardware is likely fine. If your ECG app still works, that’s proof: the same physical sensor module powers both ECG and optical heart rate, but they use different software pathways. The real issue lies in the watchOS logic, particularly around charging states and background monitoring. Fortunately, there are proven fixes — from simple restarts to clever workarounds — that can restore your heart rate tracking fast.


Clean the Sensor Thoroughly

Apple Watch sensor cleaning microfiber cloth

Remove Sweat, Lotion, and Dirt Blocking Readings

Even a thin layer of sweat, lotion, or grime can block the green LED sensors on the back of your Apple Watch, preventing accurate heart rate detection. If the sensor can’t make proper optical contact with your skin, it won’t activate.

How to clean effectively:
– Use a soft, lint-free microfiber cloth.
– Dampen slightly with water or 70% isopropyl alcohol if needed.
– Gently wipe the entire sensor array — the cluster of round lenses on the back.
– Avoid abrasive cleaners, compressed air, or submerging the watch.

Visual test: After cleaning, cover the screen and open the Heart Rate app. You should see the green lights pulse during measurement.

Pro tip: Clean your watch weekly if you sweat heavily during workouts. Moisture buildup under the band can also interfere with readings.


Wear the Watch Snugly in the Right Position

Apple Watch correct wrist placement diagram

Optimize Skin Contact Without Restricting Blood Flow

If your Apple Watch is too loose, the sensor loses consistent contact with your skin. But if it’s too tight, you may restrict blood flow, leading to inaccurate or missing data.

Best placement:
– Wear the watch 1–2 finger widths above the wrist bone.
– Use the non-dominant hand for more stable, consistent tracking.
– Choose a breathable band like the Nike Sport Band to reduce sweat buildup.

Test it: Start a workout. If heart rate kicks in after a few minutes, poor fit was likely the culprit.


Restart Your Apple Watch Immediately

Clear Temporary Software Freezes

A simple restart fixes many glitches, including those that disable the heart rate sensor.

Steps:
1. Press and hold the side button.
2. Slide to Power Off.
3. Wait 30 seconds.
4. Press the side button again to turn it back on.

Time required: Less than 2 minutes.
Success rate: High for temporary freezes.

User report: Many users see the green lights return after a restart — but the fix may only last until the next charge.


Force Restart Both Apple Watch and iPhone

Reset Deep System Glitches

When a normal restart fails, a force restart clears deeper software lockups that may be blocking sensor access.

On Apple Watch:
– Press and hold the side button + Digital Crown for 10+ seconds.
– Release when the Apple logo appears.

On iPhone:
– Quickly press volume up, then volume down, then hold the side button.
– Release when the Apple logo shows.

Why do both? The watch and iPhone share health data. Sync issues can prevent sensor reactivation.

User confirmation: One user reported the green lights returned immediately after this dual reset.


Toggle Heart Rate Monitoring Off and On

Reset Sensor Access Permissions

A fix discovered by users: turning heart rate monitoring off and on again forces the system to re-enable the sensor.

Steps on Apple Watch:
1. Open Settings.
2. Go to Privacy & Security > Health > Heart Rate.
3. Toggle Heart Rate off.
4. Wait 5 seconds.
5. Toggle it back on.
6. Restart the watch.

User result (alamantia87): “Fixed the issue completely.”


Verify Heart Rate Settings on iPhone

Ensure Full Permissions Are Enabled

Even if settings look correct on the watch, the iPhone’s Watch app controls core permissions.

Steps:
1. On iPhone, open the Watch app.
2. Tap My Watch > Privacy > Heart Rate → ensure ON.
3. Go to Fitness Tracking → ensure ON.
4. Open iPhone Settings > Privacy > Motion & Fitness → verify Fitness Tracking is enabled.

Pro tip: Toggle both off and on to refresh the connection.


Turn Off Low Power Mode

Apple Watch Low Power Mode settings screenshot

Restore Background Heart Rate Monitoring

Low Power Mode disables heart rate tracking outside workouts. If it’s stuck on, your watch won’t record resting HR or HRV.

Steps:
1. On Apple Watch: Settings > Battery > Low Power Mode → turn off.
2. On iPhone: Watch app > My Watch > Battery → confirm setting.

Note: Low Power Mode may activate automatically after charging — check after every charge.


Use Only Apple-Certified Chargers

Apple Watch MFi certified charger comparison

Avoid Charging-State Software Bugs

Users report that non-Apple chargers may trigger a software bug where the watch stays in a “logical charging state” even after removal.

In this state:
– Heart rate settings are grayed out.
– Sensors stay disabled.
– Recovery can take 15–20 minutes.

Solution:
– Use original Apple or MFi-certified charging accessories.
– Avoid third-party magnetic pucks or car chargers.

User insight (Cool-Design-7414): Switching back to the Apple charger resolved recurring HR issues.


Reconnect to Charger Briefly to Reset State

Trick the System into Exiting Charging Mode

If the sensor fails after charging, the watch may still think it’s charging — blocking sensor access.

Quick fix:
1. Place the watch on the charger for 5–10 seconds.
2. Remove it.
3. Immediately open the ECG app (it may time out — that’s okay).
4. Wait 3–5 minutes.

Why it works: This resets the internal charging state flag, allowing the heart rate sensor to reactivate.

User-tested: One Reddit user found HR returned within 3 minutes using this method.


Run the ECG App to Force Sensor Activation

Bypass the Optical HR Software Lock

The ECG app uses the same hardware as the heart rate sensor but follows a different software path. Running it can force the sensor to wake up.

Steps:
1. Open the ECG app.
2. Place your finger on the Digital Crown.
3. Wait 30 seconds for reading (even if it fails).
4. Exit and check the Heart Rate app.

Note: ECG uses electrical signals, not optical scanning — but the sensor activation often restores optical HR as a side effect.


Calibrate Using a Second Apple Watch

Trigger System Sync and Reset

One user reported fixing their Ultra 2 by using a second Apple Watch (Series 7) to start a workout.

Steps:
1. Start a 5-minute workout on a second Apple Watch.
2. Switch back to the malfunctioning watch.
3. Open the Workout app — heart rate may now work.

Possible reason: This may trigger a calibration sync or reset background health services.


Update or Wait for a watchOS Patch

Address the Root Software Bug

Many users report the issue started after updating to watchOS 26.0.1 or 26.2. While updates can fix bugs, they can also introduce them.

Current status:
– Apple has not officially acknowledged the bug.
– No patch has been released as of watchOS 26.2.

What to do:
Check for updates: Go to Settings > General > Software Update.
Avoid beta versions — OS26 beta users report higher failure rates.
Submit feedback to Apple using the Feedback app — more reports increase chances of a fix.

User experience (Living_Cap_1246): Issue lasted 45 days, then resolved — likely due to a silent OS update.


Unpair and Re-pair Your Apple Watch

Clear Deep Sync Errors

If software tweaks fail, re-pairing can resolve connection glitches — especially after iPhone upgrades.

Steps:
1. On iPhone: Watch app > My Watch > [Watch Name] > Unpair Apple Watch.
2. Wait for backup to complete.
3. Set up as new or restore from backup.
4. Reinstall apps and reconfigure.

Warning: This takes 20–30 minutes. Back up first.


Set Up as New Without Restoring

Eliminate Corrupted Backup Data

If restoring from backup brings back the problem, try setting up without a backup.

Steps:
1. Unpair and erase.
2. Pair again, but don’t restore.
3. Set up as new.
4. Manually re-enable health features.

User test (rocket4time): Tried and failed — suggests the bug may persist even on clean setups.


Factory Reset and Check for Hardware Damage

Rule Out Physical Failure

If nothing works, the issue may be hardware-related.

Steps:
1. On Apple Watch: Settings > General > Reset > Erase All Content and Settings.
2. If the sensor still fails, contact Apple.

Possible hardware issues:
– Damaged sensor module.
– Internal water exposure.
– Cracked back crystal.

User report (katebushstanaccount): Factory reset didn’t fix it — watch became unusable for Peloton.


Visit Apple Support for Professional Repair

Get Diagnostics and Warranty Service

If all else fails, Apple can run diagnostics and repair or replace your watch.

Options:
Genius Bar appointment — fastest for hands-on testing.
Mail-in service — available in some regions.
Warranty repair — free if under coverage.

What to tell them:
– “Heart rate sensor not working — green lights don’t turn on.”
– “ECG works, but optical HR fails.”
– “Issue persists after restarts and resets.”

User result (rocket4time): Received a repaired unit — no details, but it worked.


Prevent Future Sensor Issues

Maintain Reliable Heart Rate Tracking

Once fixed, avoid recurrence with these habits:

Clean Sensors Weekly

  • Use a dry cloth after workouts.
  • Deep clean monthly with alcohol.

Use Only Apple Chargers

  • Stick to Apple-certified accessories.

Monitor After Software Updates

  • Wait a few days before updating.
  • Check forums for bug reports.

Disable Low Power Mode After Charging

  • It often activates automatically.

Use ECG as a Reset Tool

  • Run it if HR stops working — it may kickstart the sensor.

Summary: Top Fixes in Order

Step Action Likelihood of Success
1 Force restart both watch and iPhone High
2 Toggle Heart Rate in Privacy settings High
3 Clean sensor and check fit Medium
4 Disable Low Power Mode Medium
5 Reconnect to charger briefly, then remove High for charging-related bugs
6 Run ECG app to trigger sensor Medium
7 Update watchOS or wait for patch Long-term fix
8 Contact Apple Support For persistent cases

Final Note: The Apple Watch sensor not working issue is largely software-driven, not hardware failure. While frustrating, most users regain function using settings toggles, restarts, or charging workarounds. The real fix will come from Apple in a future watchOS update — so keep submitting feedback to speed up the patch. Until then, use these proven steps to get your heart rate tracking back — fast.

Fix Apple Watch SE Touch Screen Not Working


Your Apple Watch SE screen is on—but taps, swipes, and gestures do nothing. You can see the time, notifications, or your watch face, but the display won’t respond. If you’re dealing with an Apple Watch SE touch screen not working, you’re not alone. This issue has been widely reported across multiple software versions, especially after watchOS updates like 9.6.2, 10.1, 10.2, and 11.4. While frustrating, most cases are fixable—often without professional help. Whether the cause is software-related, moisture-induced, or due to hardware damage, this guide delivers step-by-step solutions backed by real user experiences, Apple support data, and verified troubleshooting methods. Let’s get your watch responding again—fast.


Check for Water Lock First

If your Apple Watch SE screen won’t respond, Water Lock may be enabled—a common but easily overlooked cause. This feature disables touch input during swimming or handwashing to prevent accidental taps.

Look for the Water Droplet Icon

Glance at the top-right corner of your screen. If you see a water droplet icon, Water Lock is active and blocking all touch functions.

Disable Water Lock Immediately

  1. Press and hold the Digital Crown.
  2. Keep holding for several seconds.
  3. You’ll hear a chime and see “Unlocked” appear on screen.
  4. Test touch functionality right away.

Important: Water Lock doesn’t disable automatically after handwashing—you must manually unlock it. If the screen remains unresponsive after unlocking, move to the next step.


Force Restart the Watch

A frozen operating system is one of the most common causes of a non-responsive touchscreen. A force restart clears temporary glitches without erasing your data.

How to Force Restart Apple Watch SE

  1. Press and hold the Side Button and Digital Crown simultaneously.
  2. Hold both for 10–15 seconds.
  3. Release when you see the Apple logo appear.

Pro Tip: If the logo doesn’t show, connect your watch to the charger and try again. Some users need 2–3 attempts before the system reboots successfully.

This single step resolves about 70% of software-related touch issues, especially those triggered by buggy watchOS updates.


Charge Before Troubleshooting

Even if your screen is lit, a low or unstable battery can prevent the watch from processing touch input or completing a restart.

Charge and Retry

  1. Attach the magnetic charger.
  2. Let it charge for at least 5–10 minutes.
  3. While still connected, perform a force restart (Side Button + Digital Crown).
  4. Wait for the Apple logo.

Why This Works: Capacitive touch relies on stable power. Charging ensures the system has enough energy to recover from crashes and restore full functionality.


Clean Screen and Hands

Dirt, oil, sweat, or lotion on the screen—or on your fingers—can block the capacitive touch sensors that detect input.

Clean the Display Properly

  1. Use a soft, slightly damp, lint-free cloth (like a microfiber cloth).
  2. Gently wipe the screen in circular motions.
  3. Dry thoroughly with a clean section of the cloth.

Avoid: Alcohol, window cleaners, compressed air, or abrasive materials—they can damage the oleophobic coating.

Wash and Dry Your Hands

Touch detection relies on skin conductivity. Wet, greasy, or gloved fingers often fail to register.

Test It: After cleaning, use a clean, dry fingertip to tap the screen. Many users report immediate improvement.


Remove Screen Protector

Apple Watch SE screen protector removal illustration

A thick or low-quality third-party screen protector is a frequent culprit behind touch failure.

Test Without Protector

  1. Carefully peel off the screen protector.
  2. Clean the exposed screen.
  3. Try using your Apple Watch without any cover.

User Feedback: Numerous reports confirm instant restoration of touch after removing misaligned or bulky protectors.

Replace with Precision Protector

If you prefer protection:
– Choose ultra-thin, laser-cut models made specifically for Apple Watch SE
– Trusted brands: Apple Armorite, ZAGG InvisibleShield, or Spigen
– Avoid adhesive-heavy or generic options

Even slight gaps or thickness can interfere with touch sensitivity.


Update to Latest watchOS

Apple Watch software update process screenshot

Software bugs in watchOS 9.6.2, 10.1, 10.2, and 11.4 have caused widespread touch screen failures.

Check for Updates

  1. Open the Apple Watch app on your iPhone.
  2. Tap General > Software Update.
  3. If an update is available, tap Download and Install.
  4. Ensure your watch is charged to 50%+ and nearby.

Critical Tip: Even if your watch says it’s “up to date,” check for patch versions (e.g., 10.1.1). These minor updates often fix critical bugs affecting touch response.

Apple has acknowledged touch responsiveness issues in past releases—installing the latest version applies essential system patches that may permanently resolve the problem.


Close or Reinstall Problematic Apps

A crashing third-party app can freeze the interface and block all touch input.

Identify App-Related Issues

  1. After a force restart, open a built-in app (e.g., Messages, Workout).
  2. If touch works in native apps but fails in a specific third-party one, the issue is likely app-related.

Fix App Conflicts

  • Close the app: Swipe up from the app switcher.
  • Uninstall and reinstall: Remove via iPhone Watch app, then redownload from the App Store.
  • Update all apps: Ensure every app is current.

Real Case: Users have reported full touch failure only when certain fitness or GPS tracking apps run in the background.


Unpair and Re-pair the Watch

Deep software conflicts—like corrupted settings or Bluetooth pairing errors—can disable touch.

How to Unpair

  1. Open Apple Watch app on iPhone.
  2. Tap All Watches.
  3. Select your watch > tap the info (i) icon.
  4. Choose Unpair Apple Watch.
  5. Confirm and wait for completion.

Backup First: Enable backup if you want to restore data later.

Set Up Again

  • Choose Restore from Backup or Set Up as New.
  • If the issue returns immediately, try new setup—your backup may contain corrupted data.

This process often resolves persistent software glitches that survive restarts and updates.


Factory Reset the Apple Watch

When all else fails, erase everything to eliminate deep system corruption.

Erase All Content and Settings

  1. On iPhone, open Apple Watch app.
  2. Go to My Watch > General > Reset.
  3. Tap Erase All Content and Settings.
  4. Enter passcode and confirm.

Warning: This removes all apps, data, and settings. Back up first.

Reconfigure the Watch

After erasure:
– Set up as new or restore from backup.
– Test touch functionality before restoring apps.

If touch works on a clean install, the issue was software-related. Reinstall apps one by one to identify the culprit.


Adjust Touch Sensitivity Settings

Accessibility features like Touch Accommodations can override default touch behavior.

Enable Touch Accommodations

  1. On Apple Watch, go to Settings > Accessibility > Touch.
  2. Adjust:
    Hold Duration: How long a tap must be held.
    Ignore Repeated Touches: Prevents accidental inputs.

Test After Changes

Some users unknowingly enabled these settings, causing delayed or missed responses. Turning them off or resetting to defaults often restores normal function.


Diagnose Hardware Damage

Apple Watch SE cracked screen damage example

If software fixes fail, the issue is likely hardware-related.

Signs of Physical Damage

  • Cracked or shattered screen
  • Discoloration near the charging port (water damage indicator)
  • Partial touch failure (e.g., top half works, bottom doesn’t)
  • Touch stopped working after a drop or water exposure

Water Exposure Risks

Even handwashing can introduce moisture under the display. If the watch wasn’t dried properly, internal corrosion may disrupt the touch sensor.

Note: Apple Watch SE is water-resistant, not waterproof. Prolonged exposure increases risk.


Seek Professional Repair

Apple does not repair Apple Watches in-store. Instead, they issue a replacement unit.

AppleCare+ Coverage

  • Covers two incidents of accidental damage per year.
  • $29 service fee per incident.
  • Replacements are same or newer model.

Out-of-Warranty Costs

Without AppleCare+, repairs can cost $200–$300—often close to the price of a new SE.

Recurring Failure Reports

Some users report:
– Touch screen failed within months of repair
– Same issue after replacement
– Multiple force restarts required daily

This suggests possible component vulnerabilities in certain batches.


Prevent Future Touch Issues

Avoid repeat problems with these best practices.

Keep watchOS Updated

Check for updates weekly. Install patches immediately—they often fix known touch bugs.

Use Compatible Accessories

  • Choose thin, precision-cut screen protectors
  • Avoid cases that press against the screen edges

Handle with Care

  • Don’t drop or press hard on the display
  • Dry thoroughly after water exposure
  • Never use sharp objects near the screen

Disable Water Lock Promptly

After swimming or washing hands, manually unlock the screen to restore touch.


Contact Apple Support

If the screen remains unresponsive after all steps, contact Apple.

How to Get Help

  • Use the Apple Support app on iPhone
  • Visit support.apple.com
  • Schedule an appointment at an Apple Store or authorized provider

Report the Bug

Submit feedback via Apple Feedback Assistant. This helps Apple prioritize fixes in future watchOS releases.


Summary: What to Do Now

Step Action Time Required
1 Check and disable Water Lock 10 seconds
2 Clean screen and hands 1 minute
3 Remove screen protector 1 minute
4 Force restart 15 seconds
5 Charge and retry restart 5–10 minutes
6 Update watchOS 10–20 minutes
7 Unpair and re-pair 20–30 minutes
8 Factory reset 20 minutes
9 Contact Apple Immediate if hardware suspected

Final Note: Most Apple Watch SE touch screen not working cases are software-related, especially after watchOS updates. Start with Water Lock, cleaning, and force restart—they solve the majority of issues. If problems persist, factory reset or replacement may be necessary. Hardware failures are less common but possible after damage. Act quickly: the longer you delay, the more data and functionality you lose.

How to Fix Apple Watch SE Not Charging


Your Apple Watch SE is dead. You plug it in, but nothing happens. No green charging ring, no red lightning bolt—just silence. You’re not imagining it. Apple Watch SE not charging is one of the most common complaints among users, especially after software updates like watchOS 10.0.1 or when using third-party accessories. But here’s the good news: in over 95% of cases, this issue isn’t permanent. Whether it’s a simple misalignment, a dirty charging port, or a frozen software state, most problems can be fixed—fast. This guide walks you through every proven solution, from basic checks to advanced resets, so you can get your watch back up and running without unnecessary stress or service visits.


Clean Charging Contacts

Dirt, sweat, and oils from daily wear can block the magnetic connection between your Apple Watch SE and the charger, preventing power transfer.

Wipe Watch and Charger Surfaces

  1. Power off the watch if possible.
  2. Use a soft, lint-free microfiber cloth.
  3. Gently clean:
    – The back of the watch, where the charging coil is located.
    – The magnetic surface of the charger puck.
  4. Remove any plastic film from new chargers—some users forget this step.

Never use liquids, compressed air, or abrasive cleaners. These can damage seals or leave residue that worsens the issue.

One user reported months of charging failures until they wiped off grime from regular gym use. The fix? A 30-second cleaning that restored full functionality.


Align Charger Correctly

Apple Watch SE magnetic charging alignment

Even slight misalignment can prevent charging. The magnets should snap into place seamlessly.

Position Crown Side Up

Place your Apple Watch SE with the crown facing up and the flat edge of the charger aligned to the curved back. Let the magnets connect naturally—don’t force it.

Avoid crown-down placement. Multiple users confirmed their watch wouldn’t charge until flipped over.

If using a charging dock:
– Remove thick or metal bands.
– Lay the dock flat.
– For larger 44mm/45mm models, a slight angle adjustment may improve contact.

Apple notes that even Apple Watch Ultra users sometimes need to remove the band for full magnetic contact on older docks—so it’s worth trying with the SE too.


Force Restart the Watch

A frozen system can prevent the charging indicator from appearing, making it seem like the watch isn’t getting power.

How to Force Restart

  1. Press and hold both the Side Button and Digital Crown.
  2. Hold for at least 10 seconds.
  3. Release when the Apple logo appears.
  4. Wait two minutes, then reconnect to the charger.

High success rate. This simple step resolves many post-update glitches and unresponsive states.

One Series 7 user fixed intermittent charging with just a force restart—behavior mirrored in numerous Apple Watch SE cases.


Try a Deep Charge

If the screen stays black, the battery may be in a deep discharge state—common if the watch was left unused for days.

Leave It Charging Overnight

  • Connect using the original Apple cable and 20W USB-C adapter.
  • Do not touch it for 8 to 10 hours.
  • Avoid force restarting during this time.

⚠️ Lithium-ion batteries can enter “sleep mode” when fully drained. Prolonged charging may reactivate the battery management system.

One user left a Series 6 charging for five days—it eventually powered on with 13% charge. If your Apple Watch SE seems dead, patience could bring it back.


Verify Charging Setup

Apple Watch SE original charger vs third party

Before assuming hardware failure, confirm your accessories are working.

Use Original Apple Charger

Always start with the Apple Magnetic Charging Cable. Third-party cables—even MFi-certified ones—often fail after watchOS updates. Users report seeing a lightning bolt but the battery continues to drain.

Pro Tip: If you lost your original cable, buy directly from Apple or an authorized retailer. Avoid generic brands on Amazon or eBay.

Check Power Adapter Compatibility

Use a 20W USB-C power adapter (or higher). Lower-power adapters (like old 5W blocks) may not deliver enough current, especially with third-party docks.

Some 3-in-1 charging stands (e.g., Belkin, Anker) require their own proprietary power block. Using an Apple adapter here can cause failure. One user fixed their issue only after switching back to the manufacturer-supplied power supply.

Test Different Outlets and Ports

Rule out power source issues:
– Try a wall outlet instead of a computer USB port.
– Avoid USB hubs or extension cables.
– Test in another room or building.

If it charges elsewhere, the original outlet or adapter was the problem.


Perform Full Drain and Recharge

Reset the battery management system by fully draining and recharging.

Steps to Reset Battery Cycle

  1. Use the watch until it shuts down.
  2. Press the side button repeatedly until no response.
  3. Plug in and leave for 8–10 hours.
  4. The watch should power on automatically.

🛑 Warning: Only attempt this if the battery isn’t severely degraded. Old or refurbished units risk permanent shutdown.

FakeFred, a retired Apple QA engineer, used this method after standard fixes failed—by leaving his watch in a glove compartment for a week to fully drain.


Update or Restore watchOS

Software bugs can break charging functionality—especially after updates.

Check for watchOS Updates

  1. Open the Watch app on your iPhone.
  2. Go to General > Software Update.
  3. Install any available update.
  4. Restart the watch afterward.

📉 Known Issue: After watchOS 10.0.1, many users reported third-party chargers showing a lightning bolt but the battery kept dropping.

📈 Fix: Some found watchOS 10.1 restored compatibility. Others (like Berry with an A) say the problem persisted into 10.2 and iOS 17.3—indicating inconsistent fixes.

Factory Reset as Last Resort

If the watch won’t charge and remains unresponsive:

  1. On the watch: Settings > General > Reset > Erase All Content and Settings.
  2. Enter passcode and confirm.
  3. Re-pair with your iPhone.

Only use this if all else fails. It won’t fix hardware issues, but can clear deep software corruption.


Test with Alternative Hardware

Apple Watch SE charging diagnostic chart

Isolate whether the problem is the watch, cable, or charger.

Diagnostic Testing Matrix

Test Outcome Conclusion
Original cable + new adapter Charges Old adapter faulty
New cable + original adapter Charges Cable was bad
Original setup on another Watch Doesn’t charge Watch is defective
Known-good setup on your Watch Doesn’t charge Your watch has hardware failure

💡 Expert Advice: “Eliminate variables. If it charges on a different charger, the issue is external.”


Check Battery Health

Degraded batteries fail to hold or accept charge.

How to View Battery Health

  1. On Apple Watch: Open Settings.
  2. Tap Battery > Battery Health.
  3. Check Maximum Capacity.
  • Above 80%: Normal.
  • Below 80%: Battery is degraded. Replacement recommended.
  • Optimized Charging: May temporarily cap at 80%.

🚩 Signs of Failing Battery:
– Dies within hours
– Shuts down unexpectedly
– Shows full charge but dies immediately

One Series 6 user had 71% health after four years of GPS workouts—contributing to charging instability.


Avoid Faulty Third-Party Chargers

Many users lose charging ability after updates due to third-party charger incompatibility.

Post-Update Charger Failures

After watchOS 10.0.1, users reported:
– Lightning bolt appears but battery drains.
– Blue light on puck, no screen response.
– Only Apple chargers work.

🔍 Theory: Apple tightened authentication protocols, blocking uncertified chargers.

One user (daokfella) found even the Apple cable failed when plugged into a third-party stand—suggesting electromagnetic interference or power regulation flaws.

Use Manufacturer-Specific Power Blocks

Some third-party docks (e.g., MagSafe Duo clones) require their own power adapter. Using an Apple block disrupts voltage delivery.

Fix: Switch back to the original power supply that came with the charging stand.


Handle Refurbished or Stored Units

Reconditioned or long-stored watches may have battery issues.

Risks with Refurbished Models

A 44mm reconditioned Apple Watch SE:
– Showed no charging indicator.
– Displayed “Will charge only to [X]%.”
– Touch unresponsive.

Despite using original charger and iPhone 13 (iOS 18.7.1), it failed. Amazon coordinated a replacement through the seller.

🛠️ Rule: Reconditioned devices should have at least a 6-month seller warranty. Claim it fast if hardware fails early.

Storage Kills Batteries

Lithium-ion batteries degrade when stored uncharged.

❗ A “new” Series 6 stored for two years may have a dead battery. Same risk applies to Apple Watch SE.

Even sealed units can suffer if not charged periodically during storage.


Seek Professional Repair

If nothing works, the issue is likely hardware-related.

When to Get Help

Seek service if:
– No sign of life after 10+ hours on a known-good charger.
– Battery health is below 80% and dropping.
– Physical damage to back glass or charging port.
– Watch won’t force restart.
– Exposed to water or extreme heat.

Repair Options

  1. Apple Support: Free diagnostic. Covered under warranty or AppleCare+.
  2. Authorized Service Provider: Certified repairs, out-of-warranty pricing.
  3. Mail-In Service: Initiate via Apple’s website. Includes return shipping.

💬 Note: If under seller warranty (e.g., Amazon refurbished), request replacement or refund before paying for repair.


Summary: Fast Troubleshooting Roadmap

Step Action Time
1 Clean watch and charger 2 min
2 Align crown-up, magnet snap 1 min
3 Force restart (Side + Crown) 2 min
4 Try original cable + 20W adapter 5 min
5 Leave on charger 8–10 hours Overnight
6 Update watchOS via iPhone 10 min
7 Check Battery Health 2 min
8 Factory reset (last resort) 15 min
9 Contact Apple or seller Immediate if under warranty

Success Rate: These steps resolve 95% of Apple Watch SE charging issues.


Start with the simplest fixes—cleaning, alignment, and force restart. Most charging problems are due to accessories, software, or user error, not hardware. Use Apple’s original charger, keep software updated, and check battery health regularly. If your Apple Watch SE not charging issue persists after this full checklist, it’s time for professional service. Don’t let a dead watch disrupt your day—fix it fast with the right approach.

How to Fix Apple Watch Screen Not Working


You wake up, glance at your wrist—your Apple Watch is dark. No time. No notifications. But when a message comes in, you feel the tap. It vibrates when charging. The device is on—so why won’t the screen turn on? If you’re dealing with an Apple Watch screen not working, you’re not alone. Thousands face this every year, and panic is common. But here’s the truth: a black screen doesn’t mean your watch is dead.

Most cases stem from software glitches, accidental settings, or low battery—not hardware failure. The fix? Often a 10-second force restart or turning off an accessibility feature you didn’t know was on. Even if your screen stays black, your watch might still be fully functional underneath. This guide walks you through proven, step-by-step fixes—starting with the simplest—so you can bring your Apple Watch back to life fast.


Confirm Your Apple Watch Has Power

Before diving into complex fixes, verify your watch isn’t just out of battery.

Listen for the Charging “Ding”

Plug your Apple Watch into its original Apple magnetic charger. Make sure the magnets align—especially on larger models (45mm, 49mm), where misalignment is common. If you hear a soft “ding”, your watch is charging, even if the screen stays black.

Pro Tip: After a complete battery drain, the screen may take 5 to 10 minutes to respond. Leave it undisturbed on the charger.

Look for the Lightning Bolt or Red Battery Icon

Even with a black screen, check for a faint lightning bolt or red battery symbol. Shine a flashlight at an angle—OLED screens can appear off but still be active. If nothing shows after 15 minutes:
– Try a different Apple-certified charger.
– Clean the back of the watch and charging cable with a dry microfiber cloth.
– Test the charger on another Apple Watch.

Warning: Third-party chargers often deliver unstable power, preventing boot-up. Stick to MFi-certified or Apple-original cables.


Force Restart Your Apple Watch (The #1 Fix)

If your watch is charging but the screen won’t respond, a force restart is your best shot.

How to Force Restart (All Models)

  1. Press and hold both the Digital Crown and the Side Button.
  2. Keep holding for 10 to 30 seconds—do not let go early.
  3. Release when the Apple logo appears.
  4. Wait 2–3 minutes for the system to fully boot.

User Confirmed: Brantauk, a top contributor in the Apple Community, advises holding for up to 30 seconds if you don’t see immediate results.

What to Look For After Restart

  • A spinning circle means the system is trying to load.
  • Repeated Apple logo flashes suggest a deeper issue—possibly hardware.
  • No logo at all? Move to accessibility checks.

This single step resolves over 70% of non-responsive screen cases.


Turn Off VoiceOver and Screen Curtain Remotely

Apple Watch app accessibility settings screenshot

A black screen isn’t always broken. Accessibility features like VoiceOver or Screen Curtain can disable the display while keeping the watch active.

How to Disable from iPhone

  1. Open the Apple Watch app on your iPhone.
  2. Go to My Watch > General > Accessibility.
  3. Turn off both VoiceOver and Screen Curtain.

Why This Works: These features are designed to turn off visual output. If your watch vibrates and charges but shows nothing, this could be the culprit.

Force a Display Refresh with a New Watch Face

Even if the screen is frozen, pushing a new watch face can revive it.

  1. In the Apple Watch app, go to My Watch > Watch Faces.
  2. Pick any face and tap “Send”.
  3. Wait 10 seconds.

Multiple users report this trick brought their screen back—even after failed restarts.


Exit Water Lock Mode After Swimming or Washing

After water exposure, Water Lock disables touch to prevent accidental taps.

How to Unlock

  • Turn the Digital Crown until you hear a sound and see the unlock animation.
  • Or swipe up from the bottom to open Control Center and tap the water droplet icon.

Signs You’re in Water Lock

  • Screen is visible but unresponsive to touches.
  • Water droplet icon at the top.
  • Watch vibrates but ignores taps.

Fix Tip: If the screen is black, charge first, then try turning the crown.


Test for Hardware Failure (When Software Fixes Fail)

Apple Watch screen damage examples

If your watch charges, vibrates, but the screen stays black, hardware could be the issue.

Red Flags of Physical Damage

  • No Apple logo during force restart (but you feel haptics).
  • Charging confirmed (you hear the “ding”) but no screen after 6+ hours.
  • Visible cracks, water marks, or loose back casing.
  • A faint image under bright light—this means the display is working but the backlight is dead.

User Case: Sprite91 (Series 7) reported haptics working but no screen—diagnosed as display panel failure.


Try the Gentle Pressure Test (Reseat Internal Cables)

A drop or impact can loosen the ribbon cable connecting the screen to the logic board.

How to Safely Test

  1. With a microfiber cloth, gently press on the screen edges and center.
  2. Press the back of the watch, near the charging coils.
  3. Reconnect to the charger.
  4. Attempt a force restart.

Caution: Never press hard. OLED screens are fragile. This is a last-ditch test—only try if you suspect a recent drop.

Some users have revived their watches this way, especially after accidental drops.


The Freezer Method (Last Resort, High Risk)

An unverified but occasionally effective trick used when all else fails.

Steps to Try

  1. Place the fully assembled Apple Watch (with band) in a sealed plastic bag.
  2. Put it in the freezer for 20 minutes.
  3. Remove and immediately perform a force restart.

Why It Might Work

Cold temperatures can temporarily contract components, possibly reseating loose connections or restoring conductivity in damaged circuits.

Risks:
– Condensation can short internal parts.
– Voids warranty.
– Not supported by Apple.

Only attempt if your watch is out of warranty and no other method worked.


Model-Specific Fixes and Programs

Apple Watch Series 6: Free Repair Program

Apple runs a free service program for Series 6 models with blank screens—even if out of warranty.

  • Eligibility: Check your serial number at Apple Support.
  • Covered Symptoms: Intermittent display, flickering, or complete blackout.

User Report: Michael Maeda got a free repair after confirming haptics worked but the screen stayed black.

Apple Watch Series 7 & 8: Repeated Apple Logo

If the Apple logo flashes on and off:
– Likely display or logic board failure.
– Requires professional repair.

Apple Watch Ultra: Fix Charging Alignment

The 49mm model often fails to charge properly with the band on.

  • Fix: Remove the band or lay the charger flat to ensure full magnetic contact.

Older Models (Series 1–5): Update WatchOS

Devices stuck on old versions (e.g., watchOS 9.2) freeze more often.

  • Tip: If the screen works intermittently, update via the Apple Watch app on iPhone.

Should You Repair or Replace?

When to Choose Repair

Condition Recommendation
Under warranty or AppleCare+ Free repair at Apple
Out of warranty, minor damage Third-party repair ($50–$80)
Major damage or over 4 years old Consider upgrade

Third-Party Repair: Pros and Cons

  • Pros: Faster, more affordable.
  • Cons:
  • Loses water resistance.
  • May use non-OEM parts.
  • No official support.

DIY Warning: Opening the watch with a pentalobe screwdriver voids warranty and risks damaging internal parts.


Prevent Future Screen Issues

Keep watchOS Updated

  • Update regularly through the Apple Watch app.
  • Delaying updates increases risk of bugs and crashes.

Use Original Charging Gear

  • Stick to Apple or MFi-certified chargers.
  • Clean the charging port weekly with a dry cloth.

Avoid Physical Stress

  • Don’t press the screen hard.
  • Protect from drops—even small impacts can disconnect internal cables.

Watch for Early Warning Signs

  • Intermittent blackouts.
  • Delayed wake.
  • Touch lag.

Pro Tip: Turn on Haptic Alerts so you know your watch is active—even when the screen isn’t.


Real User Results: What Actually Worked

User Model Fix That Worked
Michael Maeda Series 6 Free repair under Apple’s service program
CDFriend Series 6 Professional repair after failed update
Ok_Watch_232 Series 10 No fix—device unrepaired
Sprite91 Series 7 Diagnosed as hardware failure

Community Consensus: If your watch charges, vibrates, but the screen stays black after all fixes—it’s likely hardware.


What to Do Now: Final Action Plan

If Your Screen Still Won’t Work

  1. Charge for 6–10 hours with the original cable.
  2. Force restart (hold 30 seconds).
  3. Check accessibility settings from iPhone.
  4. Try a different charger.
  5. Visit Apple Support if no progress.

When to Give Up

  • Watch is over 5 years old.
  • Repair cost exceeds half the price of a new model.
  • No signs of life after 24 hours of troubleshooting.

Upgrade Tip: Trade in your broken watch at Apple for credit toward a new one.


A black screen doesn’t mean your Apple Watch is dead. Most issues are software-related and fixable in minutes. Start with charging and a force restart. Rule out accessibility settings. Only after those fail should you consider hardware repair. With the right steps, you might save your watch—and $400—without ever visiting a technician.

Apple Watch Says iPhone Disconnected? Fix It Fast


You glance at your wrist, and there it is—a red “X” or a blinking red iPhone icon. Your Apple Watch says iPhone disconnected, and instantly, everything stops working. No notifications. No calls. Health data won’t sync. The seamless experience you depend on is broken. If you’re using an iPhone 15, 17 Pro, or Apple Watch Series 10, Ultra, or earlier models—especially on iOS 17.0.1 or watchOS 10.6.1—you’re not alone. Thousands of users report this exact issue. But here’s the good news: over 90% of disconnections are software-related and fixable without visiting a store. This guide walks you through every step—from quick fixes to full resets—so you can restore your connection fast and prevent it from happening again.


Confirm Devices Are Within Range and Powered On

Before diving into complex troubleshooting, eliminate the most basic causes. A disconnected Apple Watch often just needs proximity or a power check.

Bring iPhone and Apple Watch Close Together

Bluetooth has a limited range—typically 3 to 30 feet—but walls, metal, or interference can reduce it significantly.
– Place your iPhone and Apple Watch within 1 foot of each other.
– Avoid keeping your iPhone in a bag, drawer, or another room.
– If syncing health data or using Apple Watch Mirroring, keep both devices in the same space.

Visual cue: After repositioning, look for the green iPhone icon to reappear on your watch face—this means the connection is restored.

Ensure Both Devices Are Powered and Responsive

A dead or unresponsive device breaks the link instantly.
– On your Apple Watch, press the side button. The screen should light up.
– If it shows a low-battery screen or stays black, charge it for at least 15 minutes.
– On the iPhone, press the side button. If nothing happens, force restart it (hold side + volume down until Apple logo appears).

⚠️ Warning: A device that’s off or frozen won’t reconnect automatically. Always verify both are powered before proceeding.


Toggle Airplane Mode to Reset Wireless Connections

iPhone Airplane Mode Control Center screenshot

Airplane Mode disables Bluetooth and Wi-Fi—the two main ways your Apple Watch connects to your iPhone. Toggling it resets the wireless stack and often restores the link.

Turn Airplane Mode On and Off on Apple Watch

  1. Swipe up from the watch face to open Control Center.
  2. Tap the Airplane Mode icon (airplane symbol).
  3. Wait 10 seconds—you may see the red “X” disappear briefly.
  4. Tap the icon again to turn Airplane Mode off.

The watch will attempt to reconnect via Bluetooth automatically.

Repeat on iPhone

  1. Open Control Center (swipe down from top-right on iPhone X and later).
  2. Tap the Airplane Mode icon to turn it on.
  3. Wait 10 seconds.
  4. Tap again to turn it off.

Pro Tip: This “double toggle” resets both Bluetooth and Wi-Fi systems and resolves the issue in under a minute for many users.


Restart Bluetooth on iPhone and Apple Watch

A frozen Bluetooth process can prevent reconnection—even if both devices are on and close.

Restart Bluetooth on iPhone

  1. Open Settings.
  2. Tap Bluetooth.
  3. Toggle it off.
  4. Wait 5–10 seconds, then toggle it back on.

Wait up to 60 seconds for the Apple Watch to reconnect.

Restart Bluetooth on Apple Watch

  1. Open Settings on the watch.
  2. Tap Bluetooth.
  3. Toggle it off, wait 10 seconds, then toggle on.

What to look for: After re-enabling, the watch may briefly show “Connecting…” before the green iPhone icon returns.

Common mistake: Skipping the wait time. Letting the system fully reset increases success rates.


Restart Both Devices to Clear Glitches

A full restart clears temporary software bugs that can block Bluetooth or Wi-Fi communication.

How to Restart Apple Watch

  1. Press and hold the side button until the Power Off slider appears.
  2. Swipe to turn off.
  3. Wait 30 seconds.
  4. Press and hold the side button again until the Apple logo appears.

Allow 1–2 minutes for boot-up.

How to Restart iPhone

  • iPhone 8 and later: Press and hold side button + volume down until the power slider appears. Slide to power off. Wait 30 seconds, then restart.
  • iPhone 7/7 Plus: Press and hold side + volume down.
  • iPhone 6s and earlier: Press and hold the side button.

After both restart, keep them close for 2–3 minutes to allow automatic reconnection.

User confirmation: Users like Fit_Response_8083 and DontTreadOnDan reported this fixed the issue—even without further steps.


Test Connection with “Ping iPhone” Feature

Use this built-in tool to check if your devices can still communicate.

Run the Ping Test

  1. On Apple Watch, swipe up to open Control Center.
  2. Tap “Ping iPhone”.

Listen for a beeping sound from the iPhone.

Interpret the Result

  • iPhone beeps: Connection is partially active. The issue may be software-related.
  • No sound: Full disconnection. Proceed to deeper troubleshooting.

Expert note: If the iPhone pings but the red icon remains, try restarting the Watch app on your iPhone.


Update iOS and watchOS to Fix Known Bugs

iPhone software update settings screenshot

Outdated or mismatched software is a leading cause of disconnection—especially on iOS 17.0.1 and watchOS 10.6.1, which have known Bluetooth bugs.

Update iPhone (iOS)

  1. Open Settings > General > Software Update.
  2. Download and install any available update.
  3. Keep iPhone connected to Wi-Fi and charged above 50%.

Update Apple Watch (watchOS)

  1. Open the Watch app on iPhone.
  2. Go to General > Software Update.
  3. Follow prompts to install.

Pro Tip: If the update stalls, keep the watch on the charger and within 3 feet of the iPhone. Restart both if needed.


Reset iPhone Network Settings to Clear Corrupted Data

Corrupted Wi-Fi, Bluetooth, or cellular settings can prevent reconnection.

How to Reset

  1. On iPhone, go to Settings > General > Reset.
  2. Tap Reset Network Settings.
  3. Confirm. You’ll need to re-enter Wi-Fi passwords afterward.

After reset:
– Reconnect to Wi-Fi.
– Wait for Apple Watch to reconnect automatically.

⚠️ Warning: Only use this if other steps fail—it erases saved networks and cellular settings.


Fix Multiple Watch Confusion in the Watch App

If you’ve used or owned more than one Apple Watch, the system might be trying to connect to the wrong one.

Select the Correct Watch

  1. Open the Watch app on iPhone.
  2. Tap “All Watches” in the top-left corner.
  3. Ensure your current watch (e.g., Series 10, Ultra) is marked as active.

Remove Old Watches

  1. In the All Watches list, tap the “i” icon next to an old or unused watch.
  2. Tap Unpair Apple Watch.

Official guidance: Apple confirms incorrect selection can trigger disconnection messages—even if Bluetooth is working.


Use Apple Watch Mirroring to Force Reconnection

A user-reported workaround that tricks the system into re-pairing.

Steps to Trigger Reconnection

  1. Restart your iPhone.
  2. After reboot, go to Settings > Accessibility > Apple Watch Mirroring.
  3. Turn Apple Watch Mirroring on.
  4. Wait 30–60 seconds for the connection to establish.
  5. Once connected, turn Mirroring off.

User success: akenns1947 used this on an iPhone 17 Pro and Apple Watch Ultra 1 with immediate results.
Note: This setting may not appear if your OS is outdated or region-restricted.


Unpair and Re-pair Apple Watch (Last Resort)

When all else fails, a full unpair and re-pair clears corrupted pairing data—the most effective long-term fix.

Unpair from iPhone

  1. Open Watch app > My Watch tab.
  2. Go to General > Reset > Unpair Apple Watch.
  3. Confirm. This erases all data on the watch.

🔐 Activation Lock: You’ll need your Apple ID and password to set it up again.

Reset Apple Watch (If Needed)

If unpairing doesn’t trigger a reset:
1. On the watch, go to Settings > General > Reset > Erase All Content and Settings.
2. Confirm and wait.

Re-pair the Watch

  1. Bring iPhone and Apple Watch close.
  2. The pairing screen should appear on the watch.
  3. Follow setup steps to restore from backup or set up as new.

Pro Tip: If the pairing screen doesn’t appear, open the Watch app and tap the “eye” icon (top-right) to manually initiate pairing.


When to Contact Apple Support

If your Apple Watch disconnects within hours of re-pairing, the issue may be hardware-related.

Signs of Hardware Failure

  • Disconnections occur even when devices are side-by-side.
  • Bluetooth fails on other accessories (AirPods, CarPlay).
  • Watch or iPhone has water or impact damage.
  • Red mobile icon persists on LTE models despite strong signal.

Next Steps

  • Contact your carrier (for LTE/Cellular models) to verify plan and eSIM status.
  • Visit Apple Support online for diagnostics.
  • Schedule a Genius Bar appointment for hardware testing.

Final note: After re-pairing, keep both devices powered on and within range for 24 hours to stabilize the connection. Avoid restarting or updating during this period.


Summary: The “Apple Watch says iPhone disconnected” issue is usually fixable. Start with Airplane Mode toggle, Bluetooth restart, and device reboot. If problems persist, update software, reset network settings, or re-pair the watch. Most users regain full functionality without visiting a store. But if disconnections return quickly, consider hardware failure or carrier issues—and contact Apple.

Apple Watch Repair Guide: Fix Common Issues


Your Apple Watch stops responding after slipping off your wrist during a workout. The screen is cracked, but it still powers on. You open Messages and see unread notifications—your health data, fitness streaks, and daily routines are still inside. But now you face a critical question: Should you repair your Apple Watch or replace it? With official repair costs sometimes nearing half the price of a new model, the decision isn’t simple. From cracked screens to swollen batteries, Apple Watch repair can restore functionality—if done right. This guide walks you through every option: Apple’s official service, third-party fixes, warranty coverage, and real-world cost comparisons. You’ll learn how to protect your data, avoid costly mistakes, and get your device working like new—without throwing good money after bad.

Check Warranty & AppleCare+ Coverage First

Before spending a single peso, verify your Apple Watch’s service eligibility. Your repair cost hinges entirely on whether your device is covered.

Use Apple’s Online Coverage Checker

Go to checkcoverage.apple.com and enter your watch’s serial number. This free tool instantly reveals:
– Whether the one-year limited warranty is active
– If AppleCare+ is enrolled
– What types of repairs are eligible

Only Apple or Apple Authorized Service Providers (AASPs) can process warranty-covered repairs. If your watch fails due to a manufacturing defect—like a battery dying prematurely or the logic board failing—and there’s no physical damage, Apple will fix it at no cost.

Know What AppleCare+ Actually Covers

If you purchased AppleCare+, you’ve bought peace of mind. It includes:
– Up to two accidental damage incidents per year
– Fixed service fees instead of full pricing:
₱2,900 for cracked screen or back glass
₱7,900 for other damage (e.g., bent housing, water exposure)

Battery replacement is also free under AppleCare+ if capacity drops below 80%. Without it, out-of-warranty battery service can cost over ₱5,000—making AppleCare+ a smart investment for active users.

Understand the Fine Print

The standard warranty does not cover:
– Cracks from drops
– Liquid damage (even if your watch is rated WR50)
– Normal battery degradation
– Issues caused by third-party repairs

And even with AppleCare+, each incident uses one of your two annual allowances. After that, you pay full out-of-warranty prices. Always weigh the cost before proceeding.

Compare Repair vs. Replace: When to Upgrade

Apple Watch repair vs replace cost comparison chart

Sometimes, fixing your Apple Watch costs more than justifying it. Use real numbers to decide.

Review Out-of-Warranty Repair Pricing

Apple Authorized Service Providers set their own rates. In the Philippines, for example:
Cracked screen on Apple Watch SE (Gen 2): ₱14,000
Diagnostic fee: ₱1,000 (non-refundable in some cases)

Meanwhile, a new Apple Watch SE starts around ₱15,000–₱18,000. At this point, Apple may suggest buying a refurbished or new model instead—especially since newer versions offer better performance and longer software support.

Calculate Your Break-Even Point

Follow this rule:

If repair costs exceed 60% of a new model’s price, consider replacing it.

Also factor in:
– Your personalized watch faces and app layout
– Synced health and fitness history
– Compatibility with existing bands
– Whether your model still receives watchOS updates

For some, the convenience of keeping their current watch outweighs the savings of upgrading.

Choose Apple-Certified Repair for Guaranteed Results

Apple Store Apple Watch repair process technician

When reliability matters, go through Apple or an authorized provider.

Visit Apple Stores or AASPs

Apple Stores and Apple Authorized Service Providers offer:
Genuine Apple parts
Factory-trained technicians
– A 90-day service guarantee (or remainder of warranty)

They follow strict procedures for disassembly, sealing, and calibration—ensuring your watch retains water resistance and sensor accuracy. This is crucial for features like ECG, blood oxygen, and heart rate monitoring.

Start a Repair Request Online

  1. Open the Apple Support app or go to support.apple.com
  2. Select Apple Watch
  3. Describe your issue (e.g., “cracked screen”)
  4. Follow troubleshooting steps or choose to schedule service
  5. Book an appointment at the nearest Apple Store or AASP

After signing in with your Apple ID, you can track your repair status in My Support.

Expect Full Diagnostics and Estimates

At the service center:
– A technician runs a complete system check
– You receive a repair estimate (if out of warranty)
– With AppleCare+, the service fee is confirmed upfront

Repairs typically take 1–5 business days, depending on part availability and shipping.

Use Trusted Third-Party Repair for Speed and Savings

If Apple’s pricing is too steep, reputable independent shops offer fast, affordable alternatives.

Find Reputable Local Repair Shops

In cities like Manila, services like MobileCare or Power Mac Center (as AASPs) provide:
– Screen, battery, and water damage repairs
– Support for all models: Series 1 to Ultra 2
– Turnaround time: 1–3 hours for most jobs

Choose shops that:
– Offer free diagnostics
– Provide written estimates before work begins
– Test all functions post-repair
– Use high-quality, name-brand parts

Know the Benefits

Third-party repair advantages:
40–60% cheaper than Apple’s out-of-warranty pricing
Same-day service in most cases
Transparency: You often see the damaged part after replacement
30–90 day repair warranty (shop-specific)

This makes third-party repair ideal for users who need quick fixes and aren’t reliant on full water resistance.

Accept the Risks

Non-authorized repairs come with trade-offs:
Loss of water resistance due to improper adhesive sealing
Misaligned sensors affecting heart rate or ECG accuracy
No Apple warranty protection for future issues
– Possible software alerts if non-genuine parts are detected (a growing concern on newer models)

Avoid any shop claiming to use “original Apple parts” without proof—many use recycled or imitation components.

Avoid DIY Repair Attempts at All Costs

damaged Apple Watch DIY repair attempt failed

Despite YouTube tutorials and repair kits, do not fix your Apple Watch yourself.

Why DIY Almost Always Fails

Apple Watch design is not user-repairable:
– The screen is fused to the digitizer and casing
– Internal components are sealed with industrial-strength adhesives
– Tiny screws and fragile connectors require precision tools

Without experience, you risk destroying the display, damaging the battery, or bricking the device entirely.

Tools Aren’t Enough

Even with a repair kit, success demands:
– Expertise in micro-soldering and electronics
– Calibration tools for sensors
– Ability to reapply waterproof seals correctly

One slip with a pry tool can tear a ribbon cable or crack the OLED panel.

Apple Blocks Unauthorized Parts

Starting with iPhone 15, Apple restricts features when non-genuine parts are installed. While not yet fully enforced on Apple Watch, future watchOS updates could disable functions like ECG or blood oxygen if a third-party screen is detected. A cheap fix today might cost you features tomorrow.

Prioritize Critical Repairs Immediately

swollen Apple Watch battery warning sign

Some issues demand urgent attention to prevent permanent damage.

Replace Swollen Batteries Right Away

A bloated battery is a fire hazard. Signs include:
– Screen popping out of the case
– Device won’t lie flat
– Overheating during charging

Only professionals should handle swollen batteries. They use safe procedures to remove and replace them without risking leakage or thermal runaway.

Address Water Damage Fast

If your watch gets wet beyond its rating:
Turn it off immediately
Dry the exterior
Bring it to a repair shop within 24 hours

Moisture causes corrosion on circuit boards. Quick cleaning improves recovery odds.

Fix Power and Boot Issues

Common symptoms:
– Won’t turn on
– Stuck on Apple logo
– Random freezing

These may stem from:
– Faulty battery connection
– Logic board failure
– Software corruption

Professionals can diagnose whether a battery reset, firmware restore, or component replacement is needed.

Ensure Proper Sealing and Testing After Repair

A successful repair isn’t just about swapping parts—it’s about restoring full function.

Demand Post-Repair Testing

After any repair, insist on testing:
Touch responsiveness across the entire screen
Heart rate and ECG accuracy
Digital Crown and side button operation
Charging and power cycles
Water resistance seal (if applicable)

Reputable shops demonstrate each test before returning your device.

Confirm Adhesive Quality

Water resistance depends on proper sealing. Look for:
Uniform adhesive around the edge
No gaps near the speaker or sensors
– Use of OEM-grade adhesives

Poor sealing leads to moisture ingress and long-term sensor failure.

Follow Proactive Maintenance Tips

Extend your Apple Watch’s life with simple habits.

Use a Protective Case

Cases absorb impact and prevent cracks. Choose one that:
– Covers the edges
– Doesn’t block sensors
– Allows wireless charging

Essential for athletes, kids, or anyone with an active lifestyle.

Monitor Battery Health

Check via:
Settings > Battery > Battery Health on your iPhone (under paired devices)

Replace the battery when capacity drops below 80% to avoid sudden shutdowns.

Avoid Extreme Conditions

Don’t expose your watch to:
– Temperatures above 35°C (95°F) or below 0°C (32°F)
– Steam (saunas, hot showers)
– Harsh chemicals (insect repellent, cleaning sprays)

These degrade seals and damage internal components.

Update watchOS Regularly

Software updates:
– Fix bugs
– Improve performance
– Patch security flaws

Keep your watch updated to ensure reliability and compatibility.


Final Note: The best Apple Watch repair decision balances cost, risk, and long-term value. Start by checking your warranty status. Use AppleCare+ whenever possible. For out-of-warranty devices, compare official quotes with trusted third-party options. Never attempt DIY fixes. Prioritize safety, sensor accuracy, and proper sealing. With the right approach, your Apple Watch can last for years—saving you time, money, and data loss.

Apple Watch Red Lightning Bolt in Circle: What It Means


You glance at your Apple Watch and see only the time—no apps, no home screen, no response—just a red lightning bolt inside a red circle. Your heart skips a beat. Is it broken? Did something go wrong? Before you panic, take a breath: this is not a hardware failure. The red lightning bolt with circle is Apple’s way of telling you that your watch is charging but has too little power to turn on. It’s a normal state when the battery is completely drained, especially after long storage or extended use without charging.

Thousands of users encounter this every year, often mistaking it for a dead or malfunctioning device. But in over 95% of cases, the solution is simple and requires no technical expertise. Whether your Apple Watch is brand new, years old, or has been sitting in a drawer for weeks, understanding what this icon means—and how to fix it—can save you time, money, and stress. Here’s everything you need to know about the red lightning bolt with circle: what it means, why it happens, and how to get your watch back up and running.

What the Red Lightning Bolt with Circle Means

The red lightning bolt inside a red circle is a clear signal: your Apple Watch is charging, but its battery is so low that it can’t power up yet. This screen appears when your watch enters Power Reserve mode, a protective state triggered when the battery hits 0%. Unlike regular low battery warnings, Power Reserve shuts down nearly all functions—apps, notifications, and even touch response—to conserve the minimal charge needed to restart.

Charging vs. Not Charging: Key Difference

It’s crucial to distinguish between two similar icons:
– ✅ Red lightning bolt + red circle = The watch is charging successfully. You just need to wait.
– ❌ Red lightning bolt alone (no circle) = Not charging—likely due to a dirty connector, damaged cable, or faulty power source.

This dual-icon system helps you quickly assess the situation. If you see the red ring, your watch is receiving power. Don’t force a restart—let it charge.

Power Reserve Mode Explained

Power Reserve mode is a built-in safety feature designed to protect your Apple Watch’s lithium-ion battery during deep discharge. When the battery reaches 0%, the watch automatically disables all non-essential systems to preserve just enough energy to reboot once charging begins.

When It Triggers

Power Reserve activates under several conditions:
– Battery fully drained from daily use
– Watch left uncharged for days or weeks
– New Apple Watch out of the box (often shipped at partial charge)
– Failed restart attempt on a critically low battery

During this mode, pressing the side button or Digital Crown does nothing. The screen shows only the time and the charging icon. This isn’t a frozen device—it’s working exactly as designed.

What You’ll See on Screen

The display is intentionally minimal:
– Current time
– Red lightning bolt (with red circle if charging)
– No apps, complications, or interaction

Don’t try to force a reboot yet. First, confirm charging is active and give it time.

How to Fix the Red Lightning Bolt with Circle

Apple Watch charging red lightning bolt troubleshooting steps

Most cases resolve within 30 minutes using these proven steps.

Connect to the Right Charger

Use only the original Apple Magnetic Charging Cable or USB-C Fast Charging Cable. Third-party cables, especially non-MFi-certified ones, often fail to deliver stable power.

Optimize Your Setup

  • Plug into a wall adapter (5V/1A or higher)—not a computer USB port
  • For faster recovery, use an iPad charger (12W+) to jump-start a deeply drained battery
  • Place the back of the watch flush against the magnetic puck

Pro Tip: If you own an Apple Watch Ultra, remove the band before charging. The thicker case can interfere with magnetic alignment.

Charge for 10–30 Minutes Without Interruption

After connecting, do not press any buttons. Let the watch charge undisturbed.

What to Expect

Time Status
0–10 min Red lightning bolt with red circle (charging)
10–30 min Should shift to green lightning bolt + green ring
30+ min Apple logo appears → watch boots normally

If the icon remains red after 30 minutes, keep charging. Some watches take 6–8 hours or even overnight to recover from deep discharge, especially if stored for weeks.

Real User Experience: “Left it on my MacBook overnight—woke up to the Apple logo.” – 木兰, Aug 2024

Perform a Hard Reset If Still Unresponsive

If the watch still won’t boot after an hour:

Force Restart Steps

  1. Press and hold the side button + Digital Crown together
  2. Hold for 10–15 seconds (up to 2.5 minutes if completely unresponsive)
  3. Release when the Apple logo appears

This clears temporary software glitches. No data is lost—it’s just like restarting a frozen phone.

⚠️ Warning: This is not a factory reset. A hard reset only reboots the system.

Troubleshoot If Still Not Charging

Apple Watch USB-C charger comparison test

Even with the red circle visible, issues can persist. Here’s how to fix them.

Clean the Charging Contacts

Dirt, sweat, and oil are the #1 cause of charging problems—accounting for 90% of cases.

Cleaning Steps

  1. Power off the watch if possible
  2. Wipe the back of the watch with a dry microfiber cloth
  3. Clean the charging puck with a cotton swab
  4. For stubborn grime, use:
    – A drop of high-alcohol aftershave on a cloth (not directly on device)
    – Or plastic-safe cleaner like Amber Seals
  5. Let all parts dry completely before reconnecting

Do: Use gentle, lint-free materials
Don’t: Use water, compressed air, or abrasive cleaners

Test with a Different Charger and Cable

Faulty accessories are a common culprit.

What to Check

  • Bent or corroded USB prongs
  • Frayed or kinked cable
  • Non-MFi certified chargers (avoid cheap knockoffs)

Best Alternatives

  • Try a different Apple-certified charger
  • Plug into a MacBook USB-C port for stable, slow charging
  • Use a wall outlet, not a power strip or USB hub

Expert Insight: Charging via MacBook has worked for users when wall chargers failed—likely due to smoother, more consistent power delivery.

Handle Deep Discharge Cases

If the watch sat unused for weeks, the battery may be in deep discharge protection.

Recovery Strategy

  • Leave on charger for 6–8 hours or overnight
  • Use a higher-amperage adapter (iPad charger: 12W+)
  • Try connecting to a MacBook for gradual, steady charge

Some users report success after 24 hours of continuous charging.

Low Power Mode vs. Power Reserve Mode

Don’t confuse these two states—they’re very different.

Feature Low Power Mode Power Reserve Mode
Activation Manual or at 20% battery Automatic at 0% battery
Functionality Apps, notifications, and most features work Only time and charging status
Interaction Full use allowed No touch response
Exit Method Toggle off in Settings Charge and restart
Icon Red lightning bolt (no circle) Red/green bolt with ring

How to Turn Off Low Power Mode
1. Open Settings
2. Tap Battery
3. Toggle off Low Power Mode

Even with Low Power Mode on, the watch will enter Power Reserve if the battery drops to zero.

New Apple Watch: Why the Red Lightning Bolt Appears

It’s completely normal for a brand-new Apple Watch to show only the red lightning bolt and time.

Why This Happens

  • Apple ships watches at 20–50% charge to preserve battery health
  • During shipping or storage, the battery can drain to 0%
  • The red circle means it’s in charging protection mode

First-Time Setup Fix

  1. Plug into the original Apple charger
  2. Wait 30 minutes without touching buttons
  3. Watch should show:
    – Red → green lightning bolt → Apple logo → setup screen
  4. Pair with iPhone as prompted

Key Tip: Do not press the side button repeatedly. Let it charge.

User Feedback: “Okay… it is working now. Thanks.” — Satisfied customer after proper charging

Model-Specific Tips and Firmware Notes

Apple Watch Ultra 2 charging alignment

All Apple Watch models (Series 1 to Ultra 2) show the red lightning bolt with circle when charging from 0%.

Apple Watch Ultra 2

  • Requires precise magnetic alignment
  • Remove the band for better contact
  • Use USB-C Fast Charging Cable for optimal results

Apple Watch Series 7 (watchOS 10)

  • Some users report red bolt after 1 hour of charging
  • Resolved with extended MacBook charging
  • Ensure watchOS is up to date for best power management

Apple Watch SE

  • Rare reports of green snake-like artifact during failed charging
  • Indicates firmware or display issue—seek Apple Support

watchOS Behavior

  • watchOS 9+: Introduced user-accessible Low Power Mode
  • Earlier versions: Only Power Reserve (no toggle)
  • Red lightning in top-left of active screen = Low Power Mode active (not a charging issue)

When to Contact Apple Support

If the red lightning bolt persists after 8+ hours on multiple chargers, it may be hardware failure.

Signs of Hardware Issues

  • No charging light change (stays red or dark)
  • Charger flickers or disconnects repeatedly
  • Watch heats up abnormally
  • Physical damage to charging port

Possible Internal Failures

  • Damaged charging coil
  • Battery degradation (common in 3+ year old watches)
  • Moisture corrosion

Recommended Actions

  • Contact Apple Support for diagnostics
  • Visit Apple Store or authorized provider
  • Request battery service if capacity < 80%

Apple offers battery replacement under warranty or AppleCare+. Out-of-warranty replacements cost $79–$99.

Prevent Future Red Lightning Bolt Issues

Avoid this situation with simple habits.

Daily Charging Routine

  • Charge every night
  • Use only Apple or MFi-certified chargers
  • Clean contacts weekly
  • Avoid extreme temperatures

Long-Term Storage Tips

  • Charge to 50% before turning off
  • Store in cool, dry place
  • Recharge every 6 months
  • Remove silicone bands to prevent moisture trapping

Charging Environment Best Practices

  • Don’t charge in humid areas (like bathrooms)
  • Avoid plastic screen protectors on the charger puck
  • Never use wet hands or damp watch

Final Tips: Expert Advice

  • The red lightning bolt with circle is a safety feature, not a defect.
  • Always check if the charger is plugged in—many users panic only to find the dock was unplugged.
  • Patience is key: Let it charge. Forcing restarts too early delays recovery.
  • Use genuine Apple accessories: They’re more reliable and protect your investment.

With proper care, your Apple Watch can last for years. The red lightning bolt with circle is just a temporary pause—not the end of the road.

Fix Apple Watch Pull-Up Menu Not Working


You raise your wrist, swipe up on your Apple Watch expecting the Control Center to appear—and nothing happens. No response. No menu. Just a silent screen. Your first instinct? Something’s broken. But here’s the truth: your Apple Watch might be working perfectly fine. Starting with watchOS 10, Apple removed the swipe-up gesture for the Control Center entirely. That’s not a glitch—it’s a permanent design change.

However, if other swipes aren’t working either—like pulling down for notifications or up for your Smart Stack—then you’ve got a real issue. Whether you’re on watchOS 9, 10, or 11, this guide cuts through the confusion and delivers proven fixes for when your Apple Watch pull-up menu isn’t responding. You’ll learn how to spot a software bug from a UI change, troubleshoot touch failures, disable interfering settings, and restore full functionality—fast.


Confirm You’re Not Mistaking a Design Change for a Bug

Before diving into complex fixes, make sure you’re not troubleshooting a feature that was intentionally removed.

Apple Watch No Longer Uses Swipe-Up for Control Center (watchOS 10+)

As of watchOS 10, swiping up from the watch face no longer opens the Control Center. This is not a malfunction—it’s Apple’s new interaction model. The change was made to reduce accidental triggers during movement, especially during workouts or daily activity.

If you recently updated and suddenly can’t access brightness, Airplane Mode, or Do Not Disturb via swipe, this is why.

Good to know: The Control Center itself still exists—you just open it differently now.

How to Open Control Center Now

To access the Control Center, simply press the side button once.

  • A short press brings up the Control Center
  • Tap any control (e.g., Flashlight, Wi-Fi, Do Not Disturb)
  • Tap outside the menu or press the Digital Crown to close

For users who find the first press unresponsive, try pressing and holding the side button for 1 second. This ensures activation even if there’s minor software lag.

Pro Tip: If you accidentally hold the button too long, you’ll see the power-off slider. Just release and try again with a quicker press.

Swipe-Up Still Works for Smart Stack—Not Control Center

Don’t confuse the two swipe-up functions:

Swipe Action Result
Swipe up from watch face Opens Smart Stack (still works)
Swipe up to open Control Center No longer available in watchOS 10+

The Smart Stack—your customizable row of complications like Calendar, Weather, and Activity Rings—still activates with a swipe up. If that works but the Control Center doesn’t, your watch is functioning as designed.


Rule Out Water Lock: A Silent Touch Killer

Apple Watch Water Lock disengage

Water Lock disables the touchscreen to prevent accidental taps when swimming or showering. But if not properly disabled, it can leave your screen completely unresponsive—making it seem like the pull-up menu is broken.

How to Exit Water Lock

  1. After water exposure, turn the Digital Crown.
  2. Keep turning until a spinning icon appears.
  3. Continue until you hear a chime or feel a haptic tap.
  4. The screen will unlock and become touch-sensitive again.

This is the only way to disable Water Lock—swiping won’t work until it’s off.

What to Do If Water Lock Won’t Turn Off

If turning the crown does nothing:
– Dry the watch thoroughly with a lint-free cloth
– Remove any screen protector that may trap moisture
– Perform a force restart (see below)
– Avoid charging until fully dry

Critical Warning: Never charge a wet Apple Watch. Wait at least 30 minutes after water exposure, and ensure the charging port is dry.


Disable Zoom: An Accessibility Feature That Breaks Swipes

The Zoom feature magnifies the screen for better visibility but alters touch input, often blocking or distorting swipe gestures.

How to Turn Off Zoom

  1. On your Apple Watch: Open Settings
  2. Go to Accessibility > Zoom
  3. Toggle Zoom to Off

After disabling, test swiping up and down immediately.

Prevent Accidental Zoom Activation

Some users enable Zoom by triple-clicking the side button. If this happens often, disable the shortcut:

  • On iPhone: Open Watch appAccessibilityZoom
  • Turn off “Triple-Click Side Button”

This prevents accidental magnification during normal use and restores normal gesture control.


Clean the Screen and Remove Poor-Quality Protectors

Dirt, sweat, oils, or low-quality screen protectors can block touch input, especially near the edges where swipe gestures begin.

How to Clean Your Apple Watch Screen

  1. Power off the watch (optional but safe)
  2. Use a nonabrasive, lint-free cloth
  3. Lightly dampen with water if needed
  4. Wipe the screen and bezel thoroughly
  5. Let dry completely before turning back on

Test Without a Screen Protector

  1. Remove the screen protector
  2. Try swiping up/down
  3. If gestures work, replace with an Apple-certified or high-quality protector

Cheap or ill-fitting protectors are a leading cause of partial touch failure, particularly for vertical swipes.


Restart Your Apple Watch (Soft Reset)

Apple Watch force restart steps

A simple restart clears temporary glitches, frozen apps, or UI hiccups that block swipe functionality.

Normal Restart Steps

  1. Press and hold the side button
  2. Slide the power off slider
  3. Wait 60 seconds
  4. Press and hold the side button until the Apple logo appears

This resolves most minor software conflicts affecting touch response.

When to Force Restart

Use a force restart if:
– The screen is frozen
– Swipes do nothing
– Normal restart fails

Force Restart Procedure:
1. Press and hold both the side button and Digital Crown
2. Hold for 10–15 seconds
3. Release when the Apple logo appears

This is safe and won’t erase your data. Many users report: “Hard restart fixed it every time.”


Restart the Paired iPhone

Sync issues between your Apple Watch and iPhone can cause interface bugs, including unresponsive gestures.

How to Restart iPhone

  1. Press and hold the side button + volume button
  2. Slide to power off
  3. Wait 30 seconds
  4. Press the side button until the Apple logo appears

After restarting, open the Watch app and ensure your devices reconnect properly.

This often fixes phantom issues affecting gesture recognition and touch responsiveness.


Update to the Latest watchOS Version

Outdated software may contain bugs that interfere with touch input or gesture recognition.

How to Update watchOS

  1. Open Watch app on iPhone
  2. Tap General > Software Update
  3. Download and install any available update
  4. Keep both devices charged and close during installation

Updates often include critical fixes for:
– Touchscreen lag
– Gesture misfires
– Control Center delays

To check your version: On Apple Watch → SettingsGeneralAboutSoftware Version


Reset All Settings (Keep Your Data)

If swipe issues persist, reset system preferences without losing apps or health data.

Steps to Reset All Settings

  1. On Apple Watch: SettingsGeneralReset
  2. Tap Reset All Settings
  3. Enter your passcode
  4. Reconnect to Wi-Fi and re-pair Bluetooth devices

This clears custom display, accessibility, and network settings—but keeps your apps, messages, and health data.


Erase All Content and Settings (Last Resort)

Only use this if all else fails and the screen remains unresponsive.

How to Wipe the Watch

From iPhone:
– Watch app → GeneralResetErase All Content and Settings
– Choose Erase All for a full reset

On Watch:
SettingsGeneralResetErase All Content and Settings
– Enter passcode and confirm

Always back up first via iCloud or iPhone sync.

After erasing, re-pair and restore from backup. Test swipe gestures immediately.


Diagnose Hardware vs. Software Failure

Apple Watch screen damage examples

Use this checklist to identify the root cause:

Symptom Likely Cause
Control Center doesn’t open with swipe Normal (watchOS 10+)
No swipes work at all Software freeze or hardware issue
Screen unresponsive after drop Possible digitizer damage
Only bottom swipes fail Partial touch sensor failure
Works briefly after restart Software conflict
Water Lock won’t disengage Moisture or sensor blockage

Signs of Hardware Damage

  • Cracked or discolored screen
  • Touch fails in specific zones (e.g., bottom third)
  • No response after full reset
  • Haptics work but no input registered

If you suspect hardware failure, contact Apple Support or visit an Apple Store.


Adjust Wrist Detection to Prevent False Locking

Overly sensitive Wrist Detection can make the watch lock instantly when tilted, creating the illusion of unresponsiveness.

How to Test Wrist Detection

  1. Lift your wrist—does the screen wake?
  2. Turn watch face down—does it lock?
  3. If it locks too fast, adjust fit or disable temporarily

Temporarily Disable Wrist Detection

  1. On Apple Watch: SettingsPasscode
  2. Turn off Wrist Detection

Re-enable it afterward for security. This helps rule out lock-state issues during testing.


Prevent Future Swipe Issues

Stay ahead of problems with these simple habits:

Weekly Maintenance

  • Wipe screen with a dry cloth
  • Clean or replace screen protector monthly
  • Restart Apple Watch weekly
  • Keep software updated

Avoid Common Triggers

  • Don’t wear the watch too loosely
  • Avoid third-party apps that run in background
  • Don’t expose to extreme heat or cold

Pro Tip: Use Low Power Mode during workouts to reduce system load and improve touch response.


Final Checklist: Fix Apple Watch Pull-Up Menu

✅ On watchOS 10+? Use side button, not swipe
✅ Is Water Lock active? Turn crown to unlock
✅ Is Zoom on? Disable in Accessibility
✅ Is screen dirty? Clean or remove protector
✅ Did you restart watch and iPhone?
✅ Is watchOS updated? Check now
✅ Try force restart if frozen
Reset All Settings if issues persist
Erase and re-pair as last resort
✅ Contact Apple Support if hardware failure suspected


Most “pull-up menu not working” issues are due to Apple’s watchOS 10 redesign, not a malfunction. But when real problems occur—like frozen screens or dead touch zones—the solutions above resolve 95% of cases. Start by confirming your OS version, then work through restarts, cleaning, and settings resets. Whether you’re adapting to the new UI or fixing a true glitch, your Apple Watch’s swipe functionality will return—quickly and reliably.

Apple Watch Protection Plan Guide


If your Apple Watch slips off your wrist during a workout, gets drenched in the rain, or is stolen from your gym bag, you’ll want more than the standard one-year warranty. The Apple Watch protection plan—primarily AppleCare+—is built to shield you from unexpected damage, costly repairs, and total device loss. It extends your coverage to two years, adds 24/7 expert support, covers accidental damage with low service fees, and even offers optional theft and loss protection. Whether you own the latest Apple Watch Ultra or a used Series 6, understanding your protection options can save you hundreds. This guide dives deep into AppleCare+, AppleCare One, and third-party alternatives like Upsie—so you can choose the best plan for your lifestyle and peace of mind.

AppleCare+ for Apple Watch: Premium Protection from Apple

AppleCare+ is Apple’s official extended service plan and the most comprehensive protection available for Apple Watch owners. It enhances the standard warranty by adding accidental damage coverage, battery service, and priority access to Apple experts.

Extended Warranty and Unlimited Support

AppleCare+ doubles your hardware coverage from one year to two, and extends technical support from 90 days to unlimited access for two years. You can reach Apple Support 24/7 via phone, chat, or the Apple Support app—perfect for resolving software glitches, connectivity issues, or syncing problems. Unlike the limited warranty, AppleCare+ covers late-appearing defects like sudden sensor failure or unexplained battery drain, as long as they aren’t caused by misuse or unauthorized modifications.

Accidental Damage Coverage with Low Fees

Apple Watch screen cracked damage repair cost

One of the standout benefits of AppleCare+ is unlimited accidental damage protection. Whether you drop your watch on pavement, crush it in a backpack, or spill water on it, you’re covered—with a small service fee per incident:

  • $69 per incident for Apple Watch, Apple Watch SE, and Apple Watch Nike
  • $79 per incident for Apple Watch Ultra, Hermès, and Edition models

Liquid damage—including rain, sweat, or full submersion—is fully covered without extra charges. Each incident resets your eligibility, so you can file multiple claims over the two-year period. Apple uses genuine parts in repairs, and replacement devices may include refurbished components that meet Apple’s strict performance standards.

Free Battery Replacement When Capacity Drops

All lithium-ion batteries degrade over time. With AppleCare+, if your Apple Watch battery holds less than 80% of its original capacity, Apple will replace it at no cost. Out-of-warranty replacements can cost over $79, so this feature alone can justify the plan’s price.

To check battery health:
1. Open the Watch app on your iPhone
2. Tap Battery > Battery Health
3. Check the “Maximum Capacity” percentage

If it’s below 80%, contact Apple Support to schedule service.

Express Replacement for Minimal Downtime

If your watch breaks and you rely on it daily, Express Replacement Service (ERS) is a game-changer. Apple ships a replacement before you return the damaged device, so you’re back in action fast—ideal for fitness tracking, health monitoring, or work needs.

Process:
1. Start a claim via Apple Support
2. Apple ships a replacement overnight
3. You erase your data and return the old device in the prepaid box

Warning: Failing to return the original device may trigger a non-return fee.

Theft and Loss Coverage: What You Need to Know

Losing your Apple Watch or having it stolen can be costly. AppleCare+ with Theft and Loss adds insurance-like protection, but strict rules apply.

How Theft and Loss Claims Work

This optional upgrade allows up to two claims per 12 months for a lost or stolen Apple Watch. Each claim requires a $119 deductible (plus tax), but it’s often much less than buying a new watch.

  • Covers all models, including Nike and Hermès editions
  • Replacement band will be Apple-branded but may differ in color or material
  • No claims for bands alone—the entire watch must be lost or stolen

Claim Requirements: Find My Must Be On

To qualify, you must have:
Find My enabled on the watch
– The device linked to your Apple ID
– Remote erasure and lost mode activated

After filing with Apple, you’ll complete the claim through AIG’s website (aigtheftandloss.com), as AIG administers the insurance.

Critical: If Find My is off when the device is lost, your claim will be denied.

No Same-Day Replacements for Lost Devices

Unlike accidental damage, theft and loss claims do not offer same-day service. Replacement time depends on region, model, and shipping. International replacements may vary in configuration.

AppleCare One: Bundle Protection for Multiple Devices

AppleCare One family plan devices covered comparison

If you own multiple Apple devices, AppleCare One offers a smarter, more flexible way to protect them all under one plan.

Benefits of a Unified Protection Plan

For $19.99/month, you can cover up to three Apple devices—iPhone, iPad, Apple Watch, or AirPods. Each additional device costs $5.99/month.

Key advantages:
Theft and loss included (up to three claims per year total)
Surge protection—a unique benefit not in standard AppleCare+
Automatic coverage when you upgrade to a newer model
Dynamic management: add or remove devices anytime

Example: With an iPhone 15, Apple Watch Ultra, and iPad Air under one plan, you can file three claims per year across any device—great for families or high-risk users.

Who Can Enroll?

To add a device:
– Must be under four years old
– In good working condition
– Linked to your Apple Account
– Headphones must be under one year old
– Only one Apple Vision Pro allowed per plan

Used or older Apple Watches (within 4 years) can be added—unlike AppleCare+, which requires enrollment within 60 days.

Family-Friendly and Easy to Manage

Since AppleCare One ties to your Apple Account, you can include devices used by family members. It also replaces individual AppleCare+ plans, and any unused balance is refunded when you upgrade.

How to Buy AppleCare+ for Apple Watch

Timing is critical. Here’s how to get covered.

Enrollment Windows

  • At purchase: Add during checkout on Apple’s website, in-store, or via the Apple Store app
  • Within 60 days: Still eligible even if you didn’t buy it initially
  • 7-day trial: New watches come with free AppleCare+ for 7 days, giving you time to decide

Pro Tip: Enroll early—don’t risk missing the 60-day window.

Purchase Methods

  1. On iPhone:
    Go to Settings > General > AppleCare & Warranty, select your watch, and follow prompts.

  2. Online:
    Visit mysupport.apple.com or checkcoverage.apple.com, sign in, and check eligibility.

  3. In Person:
    Visit an Apple Store or Apple Authorized Service Provider with your watch and proof of purchase.

Note: Some enrollments may require a remote diagnostic or serial number scan.

Repair and Service Options Under AppleCare+

Apple offers fast, reliable repair paths.

Mail-In Repairs

Apple provides a prepaid shipping kit. You:
1. Back up and erase your watch
2. Pack it securely
3. Ship it using the included label

Repairs typically take 3–7 business days.

Carry-In Repairs

Available at Apple Stores and over 5,000 Apple Authorized Service Providers worldwide. Many repairs, like cracked screens, are completed same-day.

Bring:
– Your Apple Watch
– Proof of purchase (if not linked to Apple ID)
– Charger (for diagnostics)

Express Replacement Service

As mentioned, ERS ships a replacement before you return the damaged unit. Always erase your data—the original device becomes Apple’s property.

Third-Party Option: Upsie Protection

If you’re outside Apple’s 60-day window or own a used Apple Watch, Upsie offers a budget-friendly alternative.

Upsie Plan Overview

  • $2.99/month (billed monthly)
  • $50 deductible per claim
  • 2 claims per 12-month rolling period
  • No receipt required (except to waive 90-day waiting period)

Covers:
– Cracked screens
– Liquid damage
– Battery failure
– Power issues
– Bluetooth connectivity loss

Who Should Choose Upsie?

  • Owners of used or older Apple Watches
  • Users seeking lower monthly costs
  • Those with devices over four years old

Example: A 2-year Upsie plan costs ~$71.76 vs. ~$158 for AppleCare+.

Repair Process and Limitations

  • Choose local certified repair shop or ship-in repair
  • Upsie provides a prepaid shipping label
  • User is responsible for packaging and transit insurance

Limitation: Replacement watches may not be genuine Apple devices.

Final Tips for Choosing the Right Apple Watch Protection Plan

  • Enroll early: AppleCare+ must be purchased within 60 days.
  • Enable Find My: It’s required for theft/loss claims.
  • Check battery health regularly.
  • Back up data before any repair.
  • Compare total 2-year cost—not just monthly fees.

With the right Apple Watch protection plan, you can wear your device with confidence—whether you’re hiking, swimming, or just living life on the move. Choose AppleCare+ for seamless, premium service, or Upsie for flexible, affordable coverage. Either way, don’t go unprotected.

« Older posts

© 2026 Apple Watch Reviews

Theme by Anders NorenUp ↑